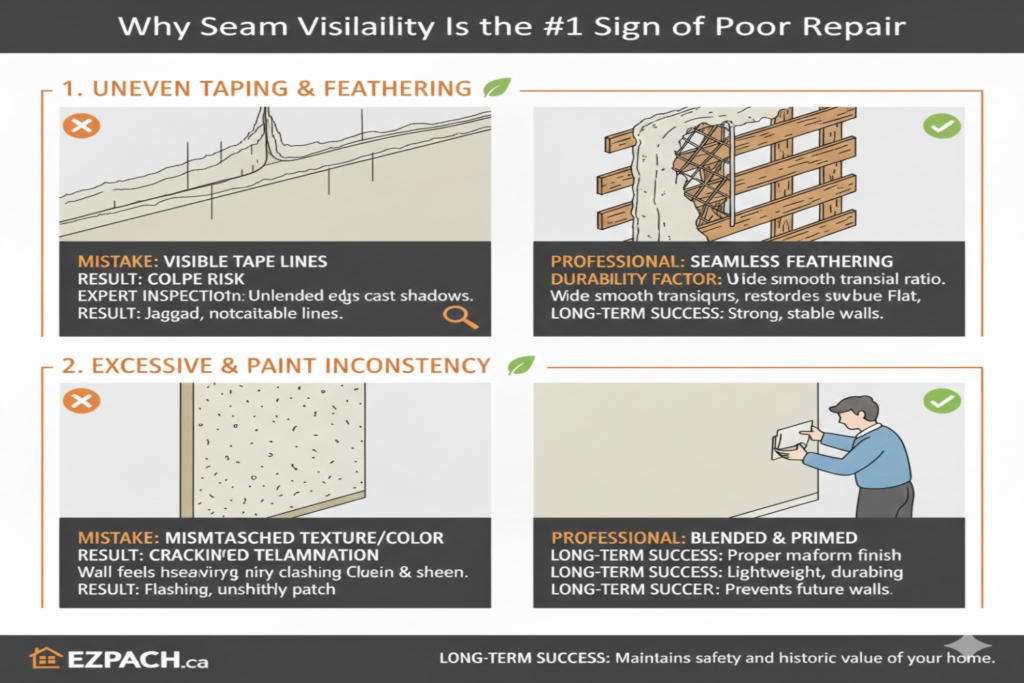
Seam visibility is one of the most common and noticeable signs of poor drywall repair. When the joints between drywall panels are visible, it makes even a newly repaired wall look unfinished or unprofessional. Homeowners often think painting over the problem will hide it, but visible seams usually indicate improper taping, mudding, or sanding during installation or repair.
Not only does seam visibility affect aesthetics, but it can also indicate deeper structural issues within your drywall installation. Poorly finished seams can crack, peel, or become more prominent over time, especially as the building settles or experiences humidity changes. Understanding the causes, prevention methods, and repair techniques is crucial for both DIY enthusiasts and professionals to achieve a flawless, long-lasting finish.
What Causes Seam Visibility in Drywall Repairs
Seam visibility occurs when the transition between two drywall panels is not smooth or properly concealed. This can happen in both newly installed drywall and repaired areas after water damage, cracks, or renovation projects.
Several factors contribute to visible seams:
- Insufficient Joint Compound: Applying too little mud prevents tape from being fully embedded, leaving lines exposed.
- Poor Tape Application: Air bubbles or wrinkles in the tape cause raised seams that show through paint.
- Inadequate Sanding: Failing to feather the edges between coats results in noticeable ridges.
- Incorrect Drywall Thickness: Using panels of different thicknesses creates uneven surfaces at the joints.
Environmental factors such as humidity, temperature fluctuations, and rapid drying of joint compound can worsen seam visibility. Understanding these causes helps homeowners and contractors identify the root problem before attempting repairs.
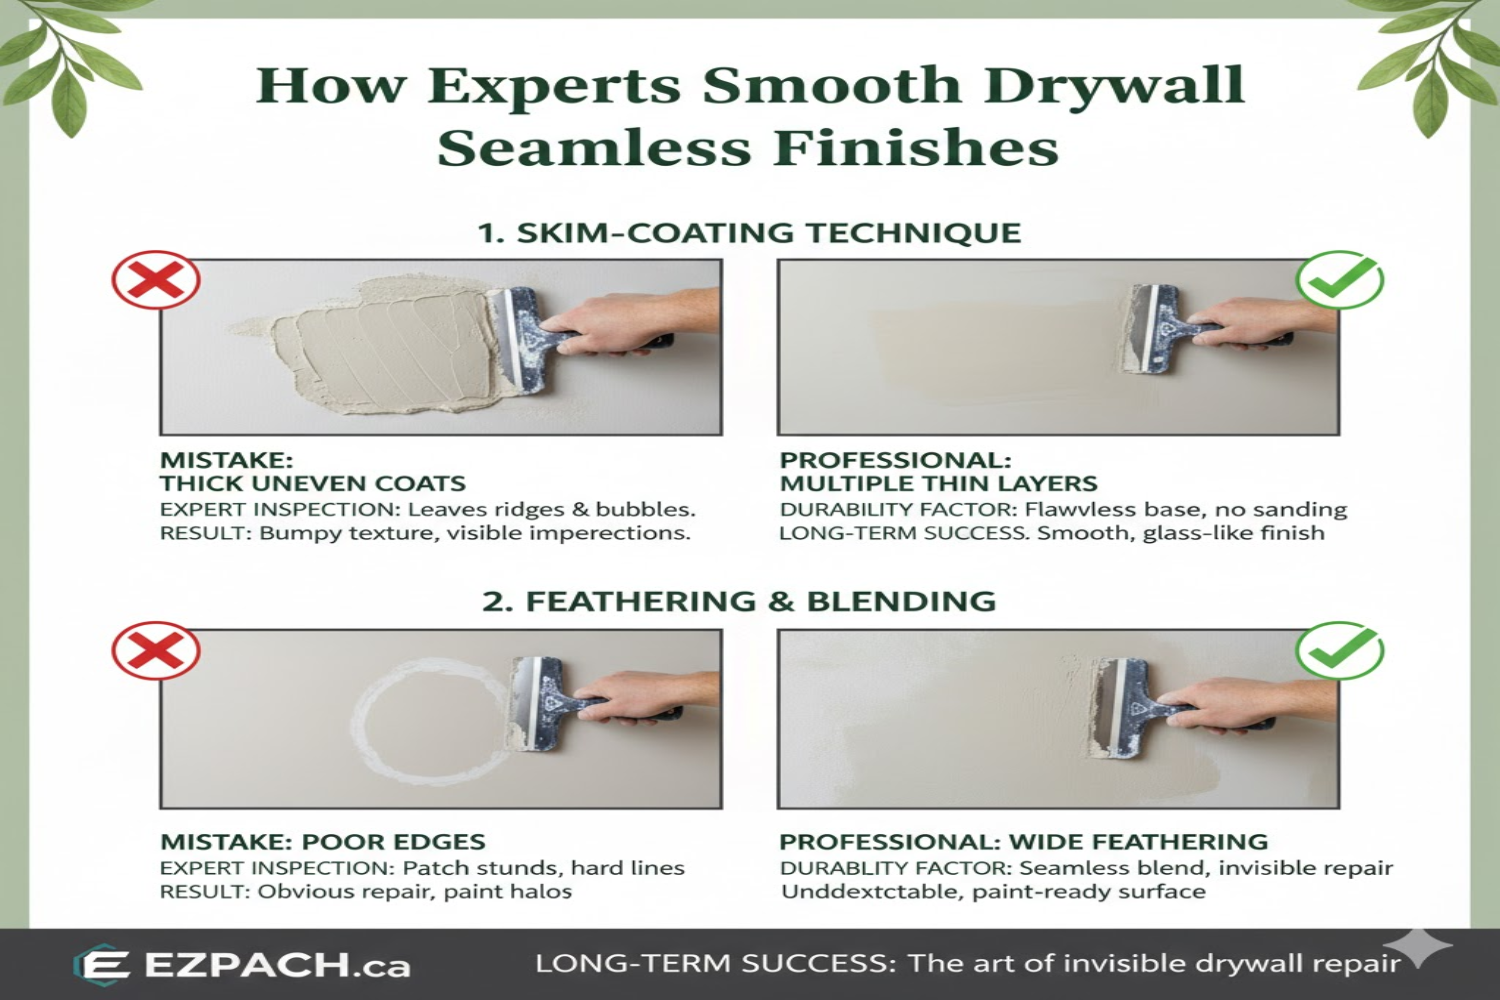
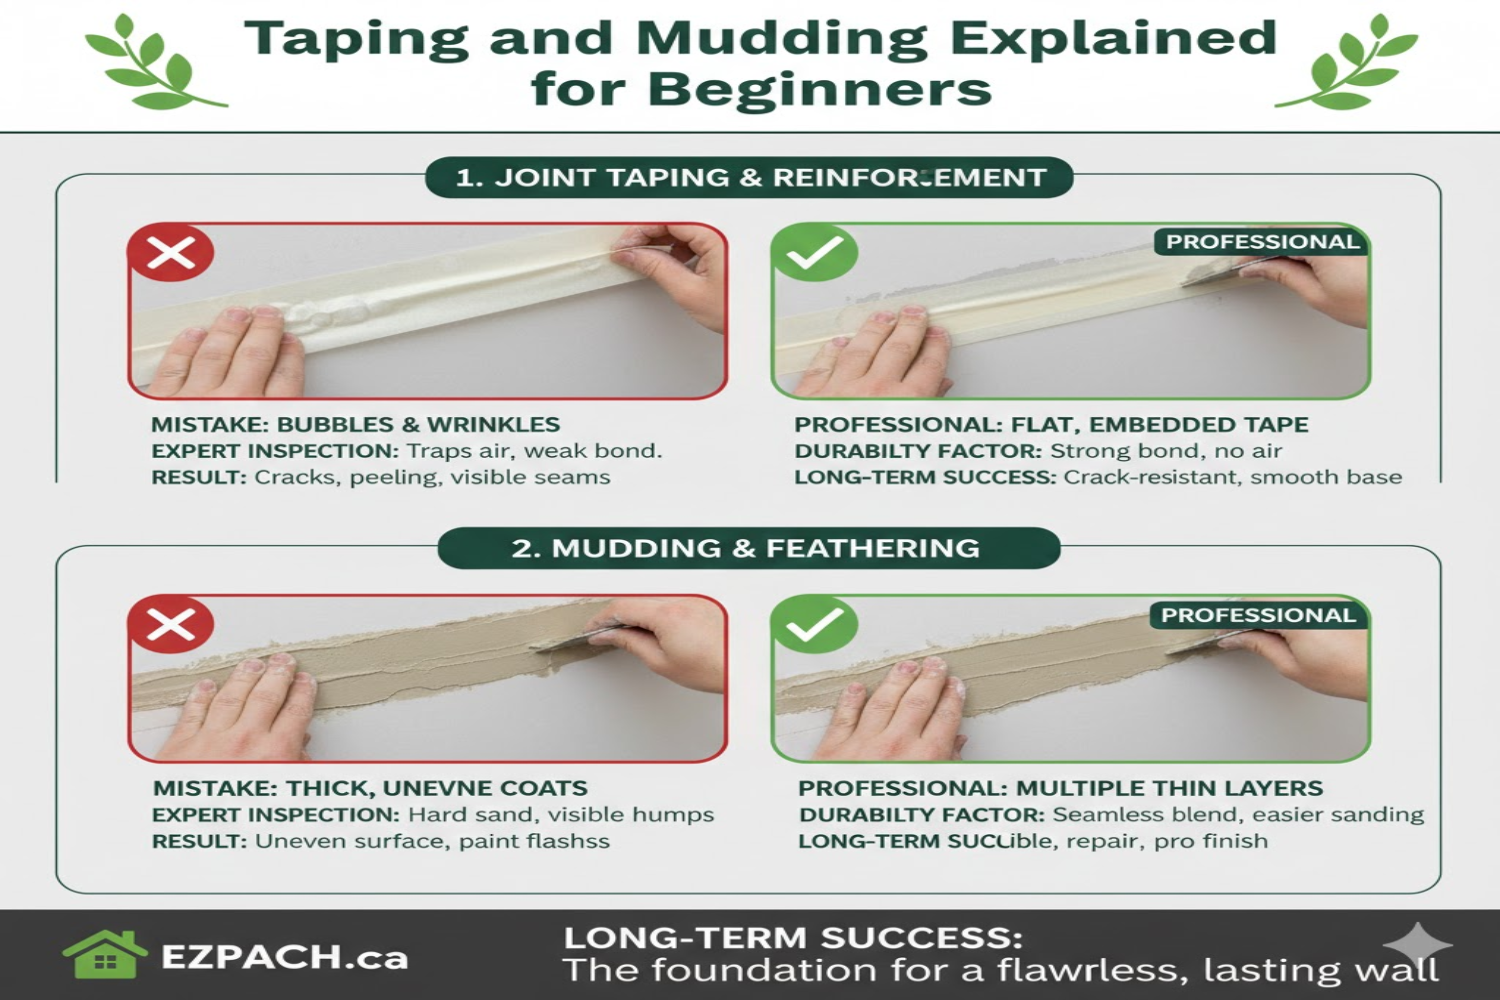
The Importance of Proper Taping and Mudding
Taping and mudding are two of the most important steps in drywall installation. Taping involves placing drywall tape over the joints between panels, while mudding covers the tape with joint compound to create a smooth, continuous surface.
Proper taping and mudding do more than just hide seams—they reinforce the structural integrity of the drywall. If these steps are skipped or done incorrectly, seams can crack or become visible over time, undermining both durability and appearance. Multiple thin coats of mud, combined with careful sanding between layers, are critical for seamless finishes. Professionals emphasize patience and technique because these details significantly impact the overall quality of the repair.
Common Mistakes That Lead to Visible Seams
Many beginners and even some contractors make errors that result in visible seams. Recognizing these mistakes can help prevent recurring problems.
Insufficient Joint Compound
- Using too little compound leaves tape lines exposed.
- Thick or uneven application in one layer can crack as it dries.
- Applying compound in multiple thin coats produces a stronger, smoother seam.
Poor Tape Embedding
- Air pockets beneath the tape create bumps and ridges.
- Uneven pressure during installation causes raised seams.
- Proper embedding ensures the tape is flush with the drywall surface.
Skipping Sanding or Feathering
- Not sanding between coats leaves edges noticeable.
- Failing to feather the compound outward exaggerates panel joints.
- Sanding carefully between coats ensures a seamless blend with the surrounding drywall.
Mismatched Drywall Thickness
- Using different thickness panels at a joint causes visible lines.
- Even minor thickness differences become noticeable under paint.
- Always match the drywall thickness when installing or repairing.
Signs of Poor Drywall Repair Beyond Seams
Seam visibility is often accompanied by other indicators of poor workmanship:
- Soft or Sagging Areas: Suggest weak joints or water damage.
- Cracks Along Seams: Can develop as a result of improper mud application.
- Uneven Surface Texture: Paint may highlight bumps or ridges.
- Peeling Paint: Indicates underlying issues with joint compound adhesion.
Noticing these signs early can prevent further damage and costly repairs. Proper evaluation ensures that the repair is not only visually seamless but structurally sound as well.
Tools and Materials Needed to Fix Visible Seams
Correcting visible seams requires the right set of tools and materials. Using improper equipment can worsen the problem, making seams more visible or creating additional imperfections.
Essential Tools
- Joint Compound: Pre-mixed or powder form, used to cover tape and fill gaps.
- Drywall Tape: Paper or fiberglass tape to reinforce seams.
- Taping Knives: Various sizes for applying compound smoothly.
- Sanding Blocks/Sponges: For feathering and smoothing surfaces.
- Mud Pans: Hold compound for easy access during application.
- Corner Trowels: Essential for inside and outside corners.
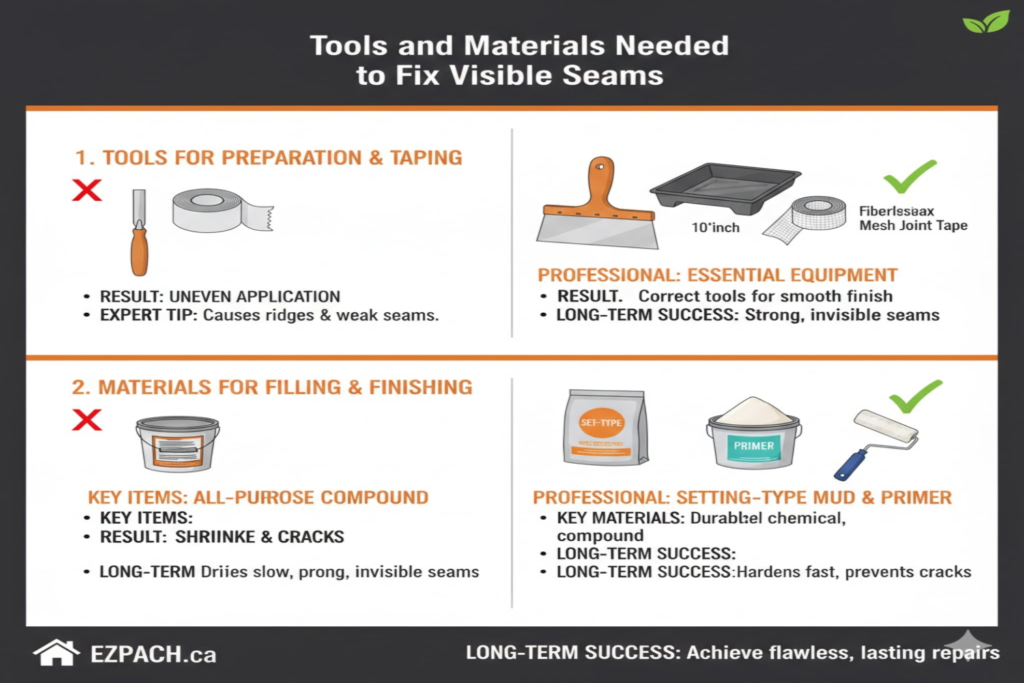
Additional Supplies
- Primer to seal the surface before painting.
- Paint to finish and blend repaired areas.
- Protective gear like dust masks and goggles.
Having the right tools and materials is key to producing professional-quality results and preventing seam visibility from recurring.
Step-by-Step Guide to Correcting Visible Seams
Repairing visible seams involves a methodical approach to ensure smooth, durable results.
Step 1: Sand the Area
- Remove any ridges or bumps with fine-grit sandpaper.
- Feather the edges so the seam blends with the surrounding wall.
- Clean off dust before applying the new compound.
Step 2: Apply Joint Compound
- Spread a thin layer over the seam using a taping knife.
- Embed new tape if necessary, pressing out air pockets.
- Smooth the compound with long, even strokes.
Step 3: Apply Additional Coats
- Apply 2–3 thin coats, each slightly wider than the previous.
- Feather the edges to create a seamless transition.
- Allow each coat to dry completely before sanding.
Step 4: Sand and Prime
- Sand the final coat until smooth and flush with the surrounding drywall.
- Apply primer to seal the surface and prevent future paint issues.
- Paint to match the existing wall color.
Pro Tips for Professionals
- Always work in small sections to maintain control.
- Avoid overloading the knife with compound to prevent bumps.
- Maintain a consistent environmental temperature to allow the compound to dry evenly.
Preventing Seam Visibility in Future Repairs
Preventing seam visibility is easier than fixing it after the fact. By following best practices, you can avoid the frustration of repeated repairs.
- Match Drywall Thickness: Avoid using mismatched panels at joints.
- Embed Tape Properly: Press out air pockets and ensure tape is flush with the wall.
- Use Multiple Thin Coats: Layer compound gradually instead of applying thick mud.
- Sand Between Coats: Feather edges carefully for a seamless blend.
- Maintain Controlled Environment: Avoid rapid drying or high humidity during repair.
DIY vs Professional Repairs
Seam visibility is often more common in DIY projects due to a lack of experience or tools. Professionals have the knowledge and equipment to minimize visible seams, even in complex areas.
- DIY repairs are possible but require patience, practice, and proper tools.
- Professionals handle larger areas, ceilings, or tricky corners efficiently.
- Understanding common mistakes helps DIYers achieve professional-quality results with careful attention to detail.
Cost and Labor Implications of Poor Repairs
Visible seams can lead to extra labor and cost if left unaddressed. Correcting mistakes often requires sanding, reapplying mud, and repainting.
- Extra coats of compound increase material usage.
- Labor time increases when mistakes are corrected.
- Professional services may be required for large areas or high-quality finishes.
- Preventive techniques save time, money, and frustration in the long run.
Conclusion
Seam visibility is the #1 sign of poor repair because it reflects mistakes in taping, mudding, and finishing techniques. It not only affects the appearance of walls but can also signal structural weaknesses in the drywall. Proper tools, techniques, and patience are essential to achieving a flawless finish. Addressing seams carefully ensures a durable, aesthetically pleasing repair that will last for years.
By understanding the causes, using the right materials, and following best practices, homeowners and professionals can prevent seam visibility altogether. Investing time in proper preparation, application, and finishing produces a professional-quality wall and reduces the need for costly corrections.
Frequently Asked Questions (FAQs)
1. Can visible seams be painted over?
Yes, but painting alone does not hide poorly finished seams. Proper sanding and re-mudding are required first.
2. Why do seams become visible over time?
Seams can rise due to building settling or the shrinkage of joint compound. Correct taping and layering prevent this problem.
3. Is seam visibility a structural concern?
It can be if it indicates weak joints or improper tape embedding. Otherwise, it is primarily a cosmetic issue.
4. What type of tape prevents seam visibility?
Paper tape is strong and ideal for professional joints. Fiberglass tape is easier for DIY projects.
5. How many coats of mud should I apply?
Generally, 2–3 coats are sufficient, feathered wider each time. Thin layers prevent cracking.
6. Can I fix seams myself?
Yes, small areas can be repaired by beginners with proper tools and techniques.
7. Does humidity affect seam visibility?
Yes, high humidity slows drying and may cause uneven surfaces. Controlled conditions help achieve smooth results.
8. How long should I wait between coats?
Wait at least 12–24 hours for each coat to dry fully. This prevents cracking and uneven seams.
Drywall Repair Halifax
EZ Patch offers clean, professional drywall, ceiling, plaster, and water damage repair services in Halifax with minimal mess and long-lasting results.
EZ Patch – Drywall Repair Experts
Trusted drywall repair professionals serving Halifax and nearby areas.
Drywall Patch & Repair
Seamless drywall repairs for holes, cracks, dents, and damaged walls.
Ceiling Repairs
Professional ceiling repair services for stains, cracks, and water damage.
Drywall Installation
Complete drywall installation services for renovations and new builds.
Taping & Mudding
Smooth, paint-ready wall finishes by expert drywall finishers.
Plaster Repair Experts
Precision plaster repair services while maintaining original wall texture.
Water Damage Repair
Drywall and ceiling restoration for properties affected by water damage.
Texture Matching
Accurate texture blending so repaired areas match existing finishes.
Installation, Repair & Removal
End-to-end drywall installation, repair, and removal solutions.