Plaster is a versatile and durable wall finishing material that has been used in homes for centuries. Whether applied to ceilings, walls, or decorative features, it provides a smooth, professional finish that enhances the aesthetics of any room. However, one of the most important aspects of plaster repairs is understanding its drying times, which can vary significantly based on the type of plaster, environmental conditions, and application thickness.
Incorrect drying can lead to cracks, uneven surfaces, or poor adhesion, compromising the durability of the repair. Knowing why plaster requires different drying times is essential for both DIY enthusiasts and professional contractors to achieve flawless results. This article explores the science behind plaster drying, factors affecting it, and best practices for achieving strong, long-lasting repairs.
Understanding Plaster and Its Composition
Plaster is composed of binders, aggregates, and water, which react chemically to harden over time. Different plaster types have unique compositions that affect drying and setting times.
Gypsum Plaster
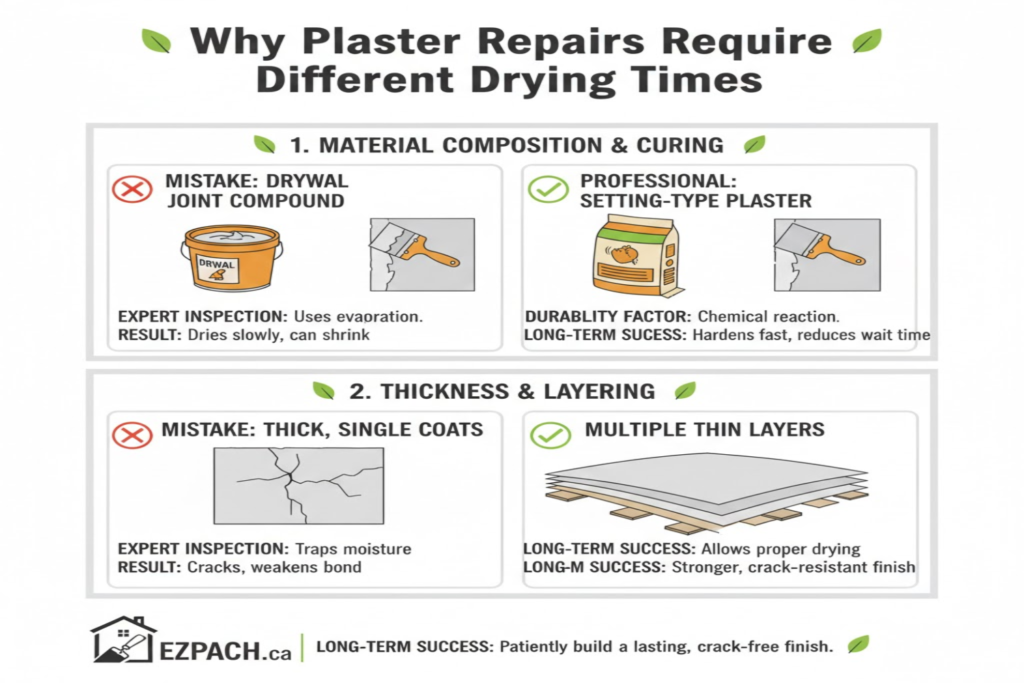
Gypsum plaster is widely used for interior walls and ceilings. It sets quickly through a chemical reaction that converts gypsum hemihydrate into gypsum dihydrate. Its fast-setting nature means it typically dries within 24–48 hours for thin layers, but thicker applications may require several days.
Lime Plaster
Lime plaster is a traditional material known for its flexibility and breathability. It dries slower than gypsum plaster because it hardens through carbonation, a process where lime reacts with carbon dioxide in the air. Full curing can take weeks, especially in thick layers, making careful timing crucial.
Cement Plaster
Cement-based plaster is used for both interior and exterior surfaces. It sets through hydration, where water chemically reacts with cement particles. Drying time varies depending on the thickness and ambient conditions, typically taking 3–7 days before it is ready for finishing.
Factors Affecting Plaster Drying Times
Several variables determine how quickly plaster dries. Understanding these factors allows for accurate scheduling of repairs and finishing work.
Layer Thickness
Thicker layers of plaster retain more moisture and take longer to dry. Thin layers may dry within hours, while applications over 1 inch thick can require several days to cure properly.
Environmental Conditions
Temperature, humidity, and ventilation significantly affect drying. Warm, dry, and well-ventilated spaces accelerate drying, while cold or humid environments slow the process. Contractors often adjust drying times based on seasonal conditions.
Plaster Type
As discussed, gypsum, lime, and cement plasters have different chemical properties, which inherently affect drying speed. Gypsum is fast-setting, lime is slow-curing, and cement falls in between depending on composition and additives.
Common Mistakes Affecting Plaster Drying
Even with knowledge of plaster types and environmental factors, errors during application can extend or disrupt drying times.
- Applying plaster too thickly in one layer can trap moisture and cause cracking.
- Using excessive water during mixing increases drying time and reduces strength.
- Poor ventilation slows evaporation, delaying the curing process.
- Rushing, sanding, or painting over partially dried plaster leads to flaking or uneven surfaces.
- Ignoring manufacturer guidelines for specific plaster types may result in inconsistent drying.
Step-by-Step Drying Process of Plaster Repairs
Understanding the drying stages helps ensure successful repair work and prevents common issues.
Initial Setting
Plaster begins to set within minutes to hours, depending on the type. During this stage, the material stiffens but still contains significant moisture.
Hardening
Over the next several hours to days, plaster gradually hardens as chemical reactions continue. The surface may appear dry, but moisture remains trapped in the inner layers.
Curing
Curing is the final stage, where plaster achieves full strength. Gypsum plaster may cure in 1–2 days, while lime plaster can take weeks. Ensuring sufficient time for curing prevents cracking, shrinkage, and adhesion failure.
Environmental Control for Optimal Drying
Proper environmental management is critical for predictable drying times.
Temperature Control
Maintaining consistent indoor temperatures between 18–24°C helps plaster dry evenly. Extreme heat can cause rapid surface drying, leading to cracks.
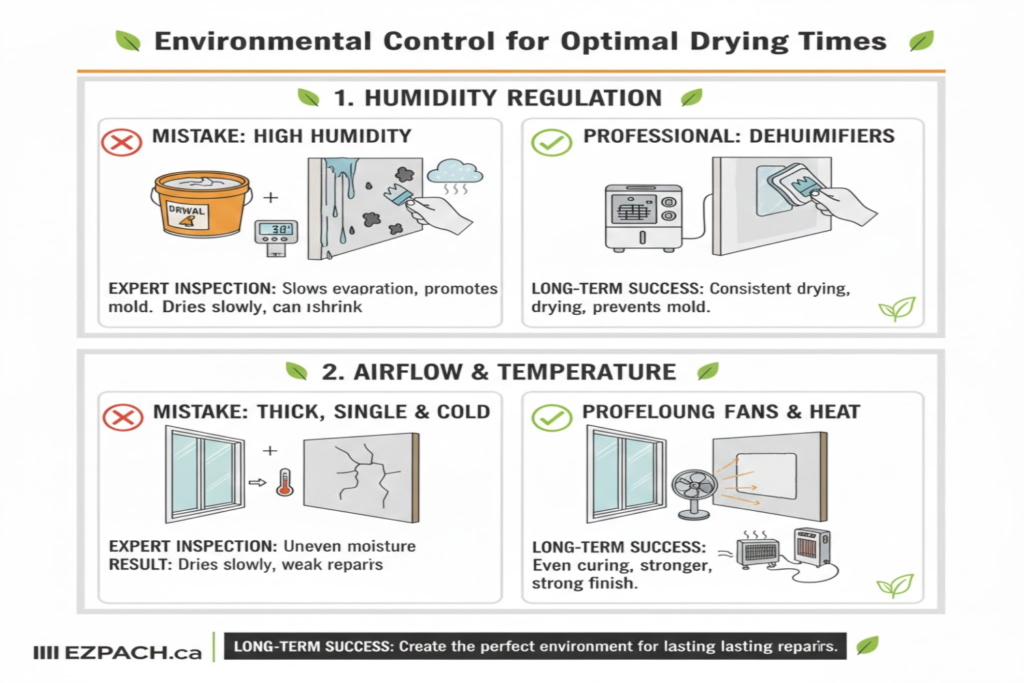
Humidity Management
Low humidity accelerates evaporation, while high humidity slows it. Using dehumidifiers in wet conditions or humidifiers in dry conditions ensures optimal moisture levels for curing.
Ventilation
Good airflow encourages uniform drying. Opening windows or using fans can prevent moisture pockets and reduce the likelihood of surface imperfections.
How Different Plaster Types Influence Drying Schedule
Each plaster type not only has a distinct chemical setting mechanism but also affects project planning.
Gypsum Plaster Schedule
Gypsum plaster sets fast, allowing for quick repairs and sanding within 24 hours. Contractors often schedule painting 48 hours after application for thin layers.
Lime Plaster Schedule
Lime plaster requires patience; thin coats may be dry to the touch in 3–5 days, but full curing can take up to 6–8 weeks. Multiple coats must be applied carefully, allowing each layer to dry sufficiently.
Cement Plaster Schedule
Cement plaster dries moderately fast, generally ready for finishing after 3–7 days. Thick applications, exterior surfaces, or cool climates may require longer curing times.
Tips to Ensure Proper Drying of Plaster Repairs
- Avoid excessive water when mixing plaster.
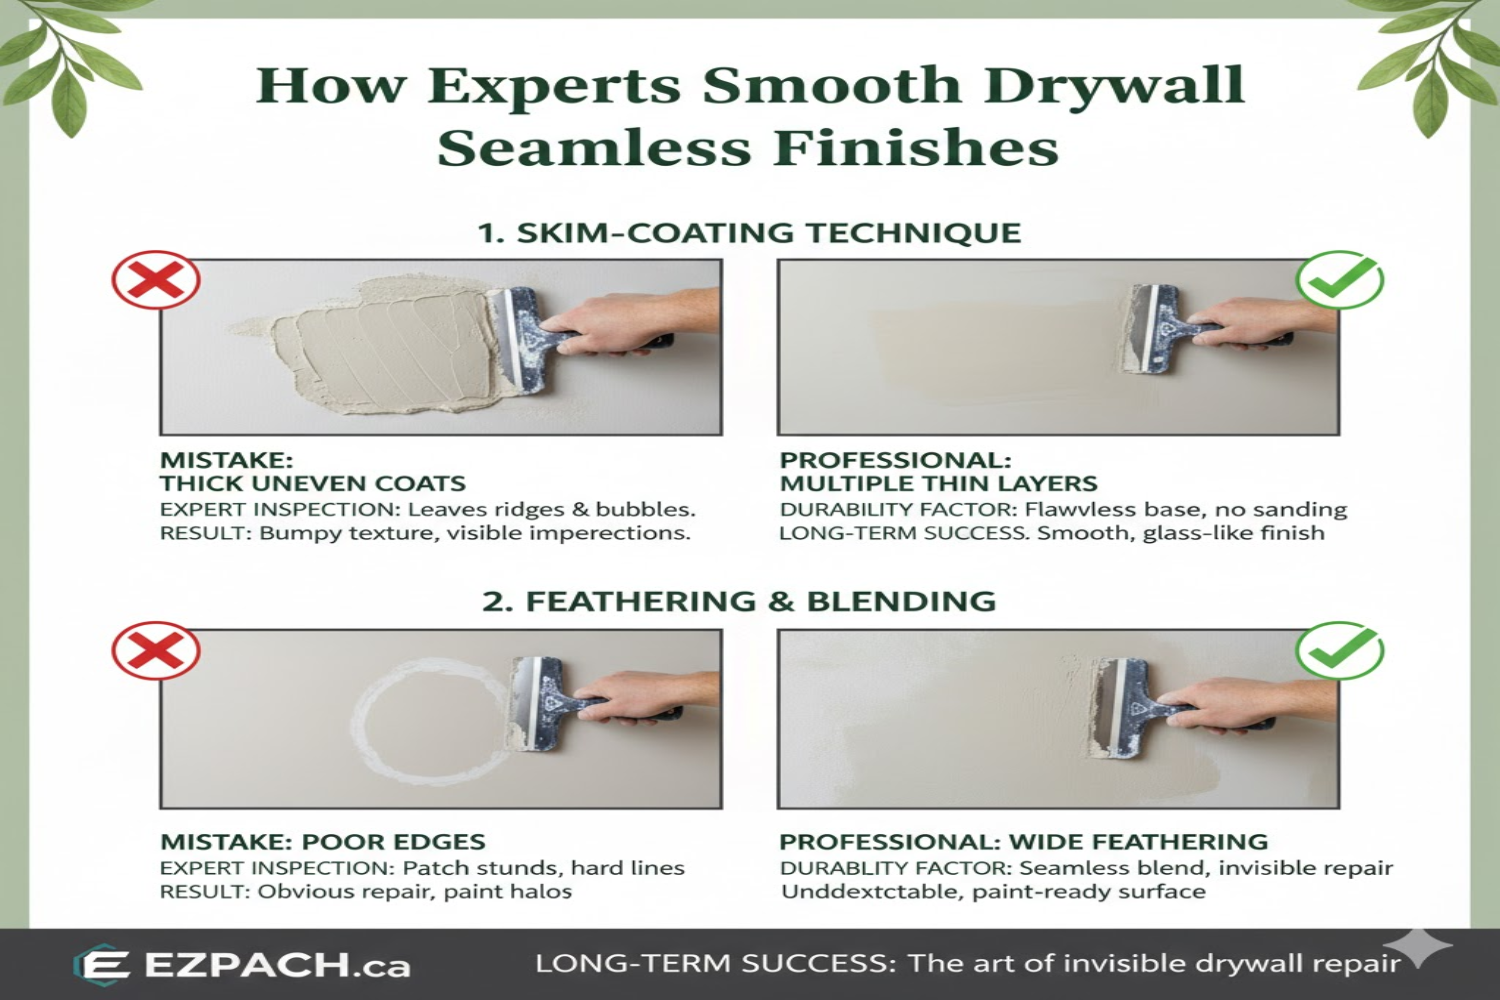
- Apply thin, even layers instead of one thick layer.
- Maintain consistent temperature and humidity in the room.
- Use fans or ventilation to aid airflow.
- Wait for complete curing before sanding, painting, or applying wallpaper.
Advantages of Understanding Drying Times
- Prevents cracks, shrinkage, and flaking.
- Ensures strong adhesion and durability of repairs.
- Saves time by reducing the need for rework.
- Optimizes scheduling for multi-step projects, like painting or texturing.
- Improves the overall finish and aesthetics of walls and ceilings.
FAQs
1. Why does plaster dry more slowly in winter?
Lower temperatures reduce evaporation, causing plaster to retain moisture longer.
2. Can I speed up plaster drying with heat?
Using gentle heat can help, but excessive heat may cause cracking or uneven drying.
3. How long should I wait before sanding plaster?
Thin gypsum layers may be sanded after 24 hours, while lime plaster requires several days.
4. Is humidity the most important factor in drying?
Humidity significantly affects drying, but temperature, ventilation, and plaster type are equally important.
5. Can thick plaster layers dry evenly?
Thick layers may dry unevenly; applying multiple thin coats is recommended.
6. Does exterior plaster dry differently from interior plaster?
Yes, exterior plaster is exposed to varying temperatures and humidity, often requiring longer curing times.
7. Are fast-drying plasters always better for repairs?
Not always; while fast-drying plasters save time, they may crack if applied too thickly or under poor conditions.
8. Can I paint over plaster before it’s fully dry?
Painting too soon can trap moisture, leading to peeling or bubbles. Always allow full curing before finishing.
Conclusion
Plaster repairs require different drying times due to variations in plaster types, layer thickness, and environmental conditions. Understanding these factors ensures repairs are strong, durable, and visually appealing. By respecting the chemical setting and curing processes, homeowners and professionals can avoid common mistakes like cracking, flaking, and poor adhesion.
Proper environmental control, careful application, and patience are key to successful plaster repairs. Following recommended drying schedules and adjusting for seasonal conditions guarantees long-lasting results while maintaining the aesthetic beauty of walls and ceilings. Knowing why plaster requires different drying times allows for better planning, cost efficiency, and higher-quality repairs.
Drywall Repair Halifax
EZ Patch offers clean, professional drywall, ceiling, plaster, and water damage repair services in Halifax with minimal mess and long-lasting results.
EZ Patch – Drywall Repair Experts
Trusted drywall repair professionals serving Halifax and nearby areas.
Drywall Patch & Repair
Seamless drywall repairs for holes, cracks, dents, and damaged walls.
Ceiling Repairs
Professional ceiling repair services for stains, cracks, and water damage.
Drywall Installation
Complete drywall installation services for renovations and new builds.
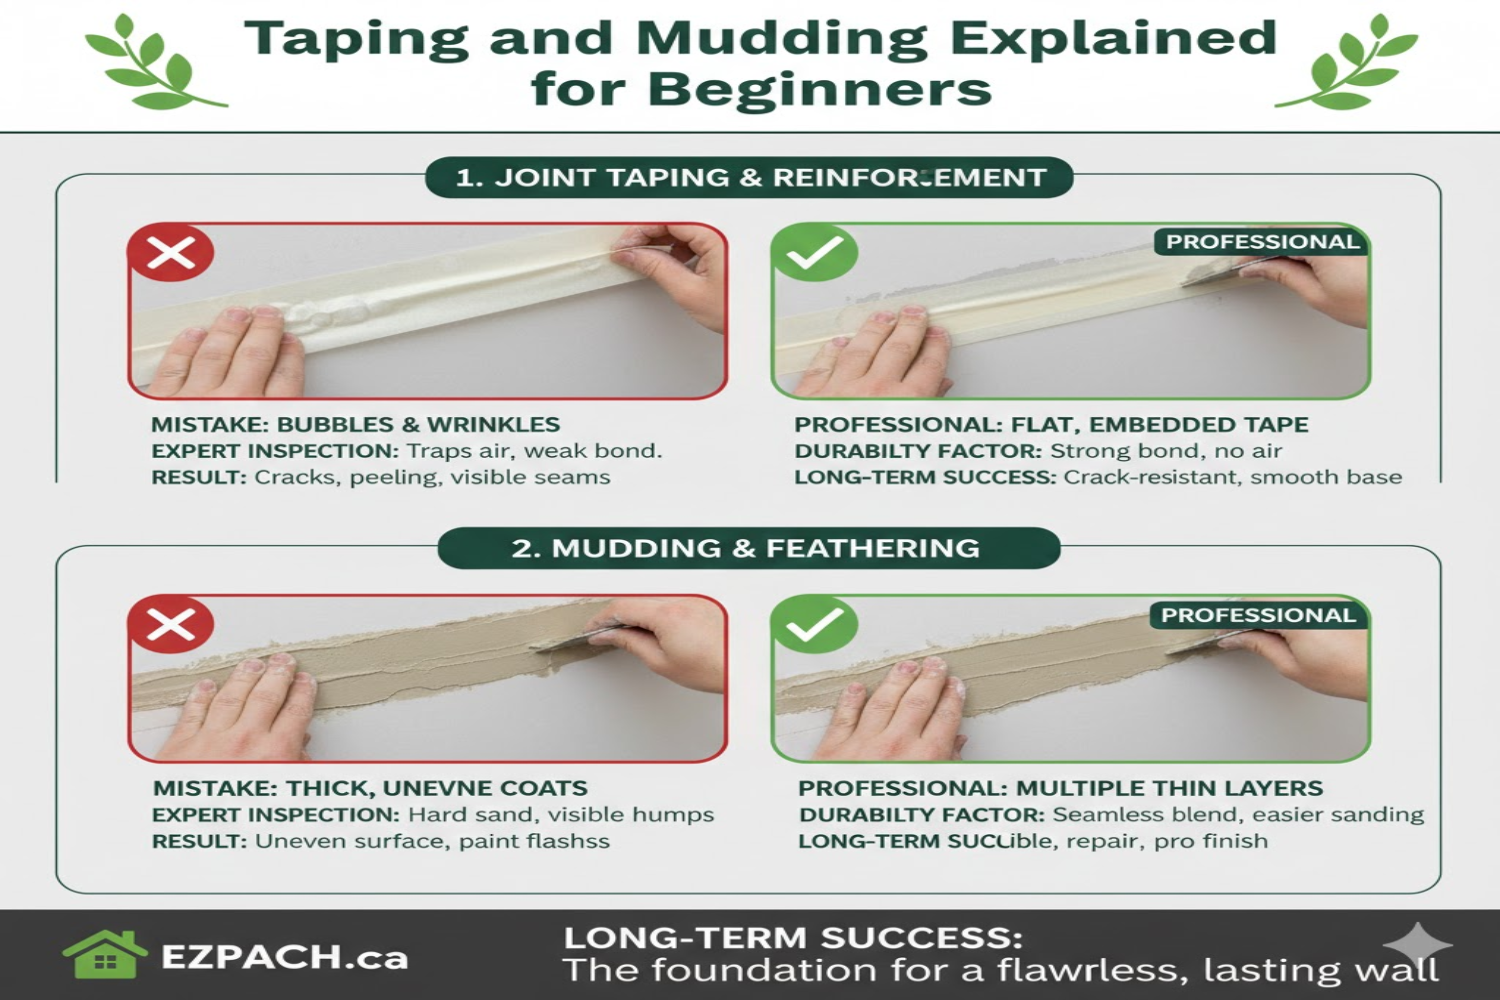
Taping & Mudding
Smooth, paint-ready wall finishes by expert drywall finishers.
Plaster Repair Experts
Precision plaster repair services while maintaining original wall texture.
Water Damage Repair
Drywall and ceiling restoration for properties affected by water damage.
Texture Matching
Accurate texture blending so repaired areas match existing finishes.
Installation, Repair & Removal
End-to-end drywall installation, repair, and removal solutions.