DIY drywall repair is often marketed as an easy, budget-friendly solution for damaged walls. Many homeowners believe that filling a hole, sanding it smooth, and painting over it is enough to restore a wall’s appearance. Initially, these repairs may look acceptable, especially to an untrained eye. However, as time passes, most DIY drywall repairs begin to deteriorate and stand out even more than the original damage.
The reality is that drywall is a structural surface, not just a cosmetic one. It reacts to moisture, temperature changes, vibration, and natural settling of the building. When repairs are done without proper technique, materials, and preparation, those repaired areas fail to perform like the rest of the wall. This is the core reason why most DIY drywall repairs look worse over time and eventually require professional correction.
Why DIY Drywall Repairs Often Fail After the Initial Fix
One of the biggest reasons DIY drywall repairs fail is that they are designed for short-term appearance, not long-term durability. Many homeowners focus on making the wall “look fine” for now, without considering how the repair will age. This approach ignores how drywall naturally expands, contracts, and flexes over time.
DIY repairs also lack consistency. Uneven pressure during application, improper feathering, and poor blending may not be obvious immediately. Over time, however, these flaws become highlighted by lighting, paint aging, and surface movement. What once looked passable slowly turns into a visible eyesore.
What Changes in a DIY Repair as Time Passes
Drywall repairs go through several changes after completion. Joint compound shrinks as it cures, paint settles into porous areas, and wall movement stresses the repaired section. If the repair was not built correctly, these natural processes expose every shortcut taken.
Within months, patches may sink inward or raise slightly above the wall surface. Paint sheen differences become more noticeable, and the edges of the repair begin to outline themselves. These changes explain why DIY drywall repairs rarely remain invisible.
Common Long-Term Changes
- Shrinkage of joint compound
- Visible patch edges
- Uneven paint reflection
- Surface cracking around repairs
Key Reasons Most DIY Drywall Repairs Look Worse Over Time
Several recurring factors explain long-term failure in DIY drywall repairs:
- Insufficient surface preparation, which weakens adhesion
- Improper layering, causing cracking and shrinkage
- Inconsistent sanding, leading to visible ridges
- Texture mismatch, making patches stand out
- Skipped priming, resulting in uneven paint absorption
Each of these mistakes might seem minor on its own. Combined, they guarantee that the repair will age poorly.
How Poor Surface Preparation Undermines Repairs
Surface preparation is the foundation of any durable drywall repair. DIY repairs often skip this step entirely or rush through it. Dust, loose drywall paper, and crumbling edges prevent joint compound from bonding properly.
When the compound does not bond fully, it separates over time. This separation causes cracking, lifting, and hollow spots beneath the surface. Even the best paint cannot hide a repair that lacks a stable base.
Surface Prep Steps Often Ignored
- Removing loose drywall material
- Sealing exposed drywall paper
- Cleaning dust and debris
- Flattening uneven edges
Why Incorrect Joint Compound Application Causes Visible Damage
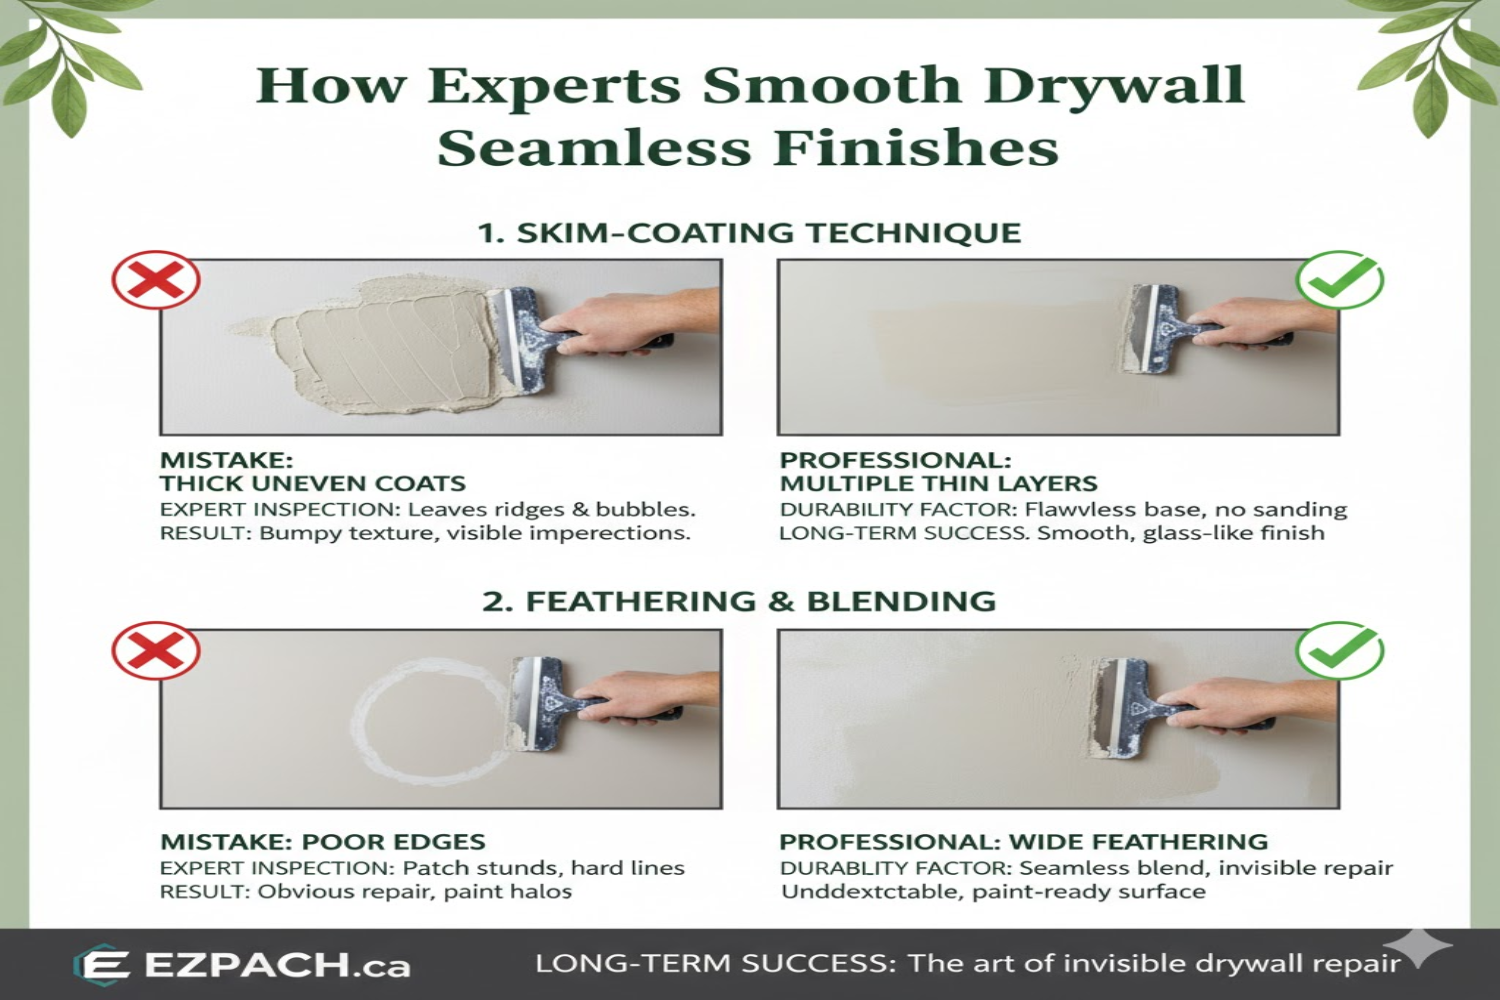
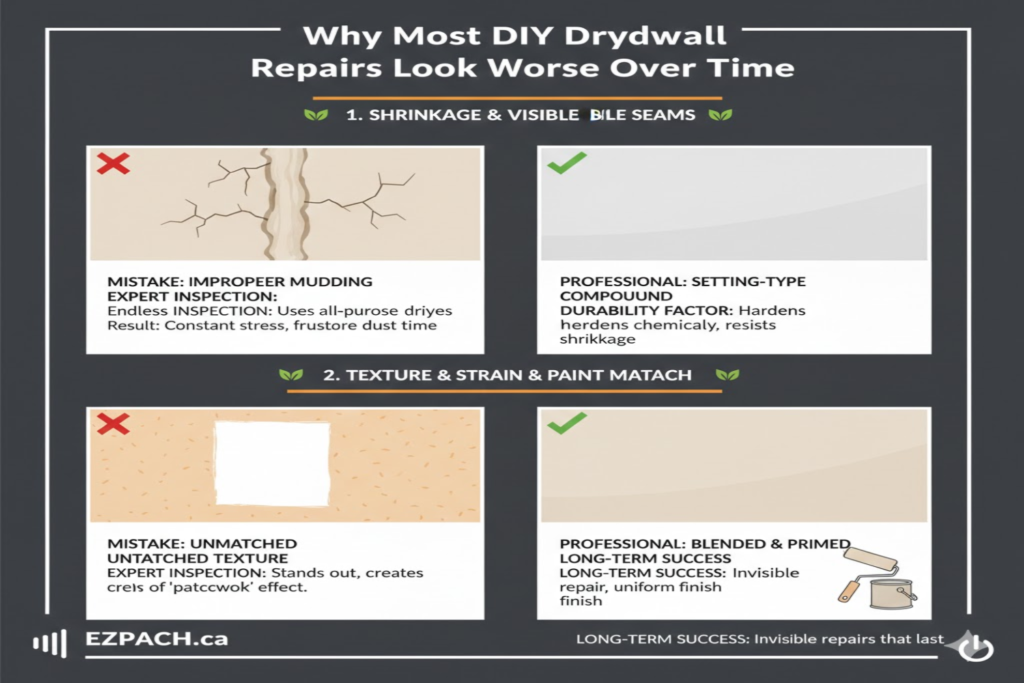
Joint compound must be applied in thin, controlled layers. DIY repairs frequently use one thick coat in an attempt to finish faster. Thick layers dry unevenly and shrink aggressively, which leads to cracking and surface distortion.
Professionals apply multiple thin layers, allowing each to dry completely. This technique builds strength and flexibility into the repair, preventing cracks and maintaining a smooth finish over time.
When Texture Problems Become Impossible to Hide
Texture matching is one of the most technically challenging aspects of drywall repair. DIY repairs often ignore this complexity. While a texture mismatch might seem minor at first, it becomes increasingly noticeable as light hits the wall at different angles.
Over time, shadows exaggerate texture inconsistencies. This is especially true on ceilings and large walls where uniform texture is critical. Once painted, mismatched textures are very difficult to correct without redoing the repair entirely.
Common Texture Errors
- Using the wrong texture method
- Applying texture too thick or too thin
- Failing to blend the texture outward
- Not testing the texture before application
How Paint Selection Makes DIY Repairs Stand Out
Paint does more than add color—it reveals flaws. DIY repairs often skip primer or use a different paint finish than the rest of the wall. This causes “flashing,” where repaired areas reflect light differently.
As paint ages, these differences become more obvious. The patched area may fade at a different rate or appear dull or glossy compared to the surrounding wall. This is one of the clearest reasons why DIY drywall repairs look worse over time.
Why Wall Movement Breaks DIY Repairs
Walls are not static. They shift slightly due to temperature changes, humidity, and building settlement. DIY repairs often use rigid or insufficient materials that cannot move with the wall.
When movement occurs, stress concentrates around the repair. Over time, this causes cracks to reappear or edges to separate. Professional repairs account for wall movement, while DIY fixes rarely do.
How Moisture Exposure Accelerates Repair Failure
Moisture is one of the most destructive forces affecting drywall repairs. Bathrooms, kitchens, basements, and exterior walls are especially vulnerable. DIY repairs usually fail to address moisture control, sealing, or ventilation.
As moisture enters the repair, it weakens the compound and paint. This leads to bubbling, staining, soft spots, and eventual failure. Moisture damage is one of the fastest ways DIY repairs deteriorate.
What DIY Repairs Miss About Structural Damage
Some drywall damage is cosmetic, but some is structural. DIY repairs often ignore the cause of cracks or holes. Structural movement, framing issues, or water damage require more than surface patching.
Covering these issues without fixing the root cause ensures the damage will return. Repeated failures in the same spot are a strong sign that the original DIY repair was incomplete.
Key Differences Between DIY and Professional Drywall Repairs
Professional drywall repairs are designed for longevity, not speed. Professionals understand material behavior, drying times, and blending techniques that keep repairs invisible for years.
Professional Repair Advantages
- Proper surface preparation
- Controlled layering and drying
- Seamless texture matching
- Paint uniformity and durability
These differences explain why professional repairs age well while DIY repairs degrade.
Why DIY Drywall Repairs Look Worse Over Time in High-Visibility Areas
DIY repairs become most noticeable in high-traffic or well-lit areas. Hallways, living rooms, and stairwells expose imperfections through constant lighting changes and viewing angles.
In these spaces, even small flaws become obvious. This makes DIY repairs particularly risky in areas where appearance matters most.
When DIY Repairs Impact Home Value
In real estate transactions, drywall condition plays a significant role in buyer perception. DIY drywall repairs are often flagged by inspectors and buyers. Visible patches suggest poor maintenance and raise concerns about hidden problems.
These issues can reduce home value, delay sales, or lead to repair credits. What once saved money can ultimately cost more during resale.
Practical Tips to Make DIY Repairs Last Longer
- Use multiple thin compound layers
- Always prime before painting
- Match texture carefully
- Allow full drying time
- Address moisture and structural causes
Conclusion
DIY drywall repair may appear simple, but the long-term results often reveal its shortcomings. Poor preparation, rushed techniques, texture mismatches, and ignored wall movement all contribute to failure. This is exactly why most DIY drywall repairs look worse over time and require repeated fixes.
Investing in proper techniques or professional services ensures repairs remain durable and invisible. Long-lasting drywall repairs protect both aesthetics and property value, making quality workmanship the smarter choice.
FAQs
1. Why do DIY drywall patches reappear after painting?
Because joint compound shrinks and moves differently from drywall when applied incorrectly.
2. Can sanding mistakes affect long-term appearance?
Yes, uneven sanding creates ridges that become more visible over time.
3. Is primer necessary for drywall repairs?
Yes, primer seals the surface and prevents uneven paint absorption.
4. Why does repaired drywall reflect light differently?
Due to a texture mismatch or skipped priming.
5. How long should joint compound dry fully?
Typically 24–48 hours, depending on humidity and thickness.
6. Are DIY drywall kits reliable long-term?
Only for very small repairs; they lack durability for larger damage.
7. What causes recurring cracks in the same area?
Unaddressed structural movement or moisture issues.
8. When should drywall repairs be handled professionally?
For large holes, recurring cracks, moisture damage, or resale preparation.
Drywall Repair Halifax
EZ Patch offers clean, professional drywall, ceiling, plaster, and water damage repair services in Halifax with minimal mess and long-lasting results.
EZ Patch – Drywall Repair Experts
Trusted drywall repair professionals serving Halifax and nearby areas.
Drywall Patch & Repair
Seamless drywall repairs for holes, cracks, dents, and damaged walls.
Ceiling Repairs
Professional ceiling repair services for stains, cracks, and water damage.
Drywall Installation
Complete drywall installation services for renovations and new builds.
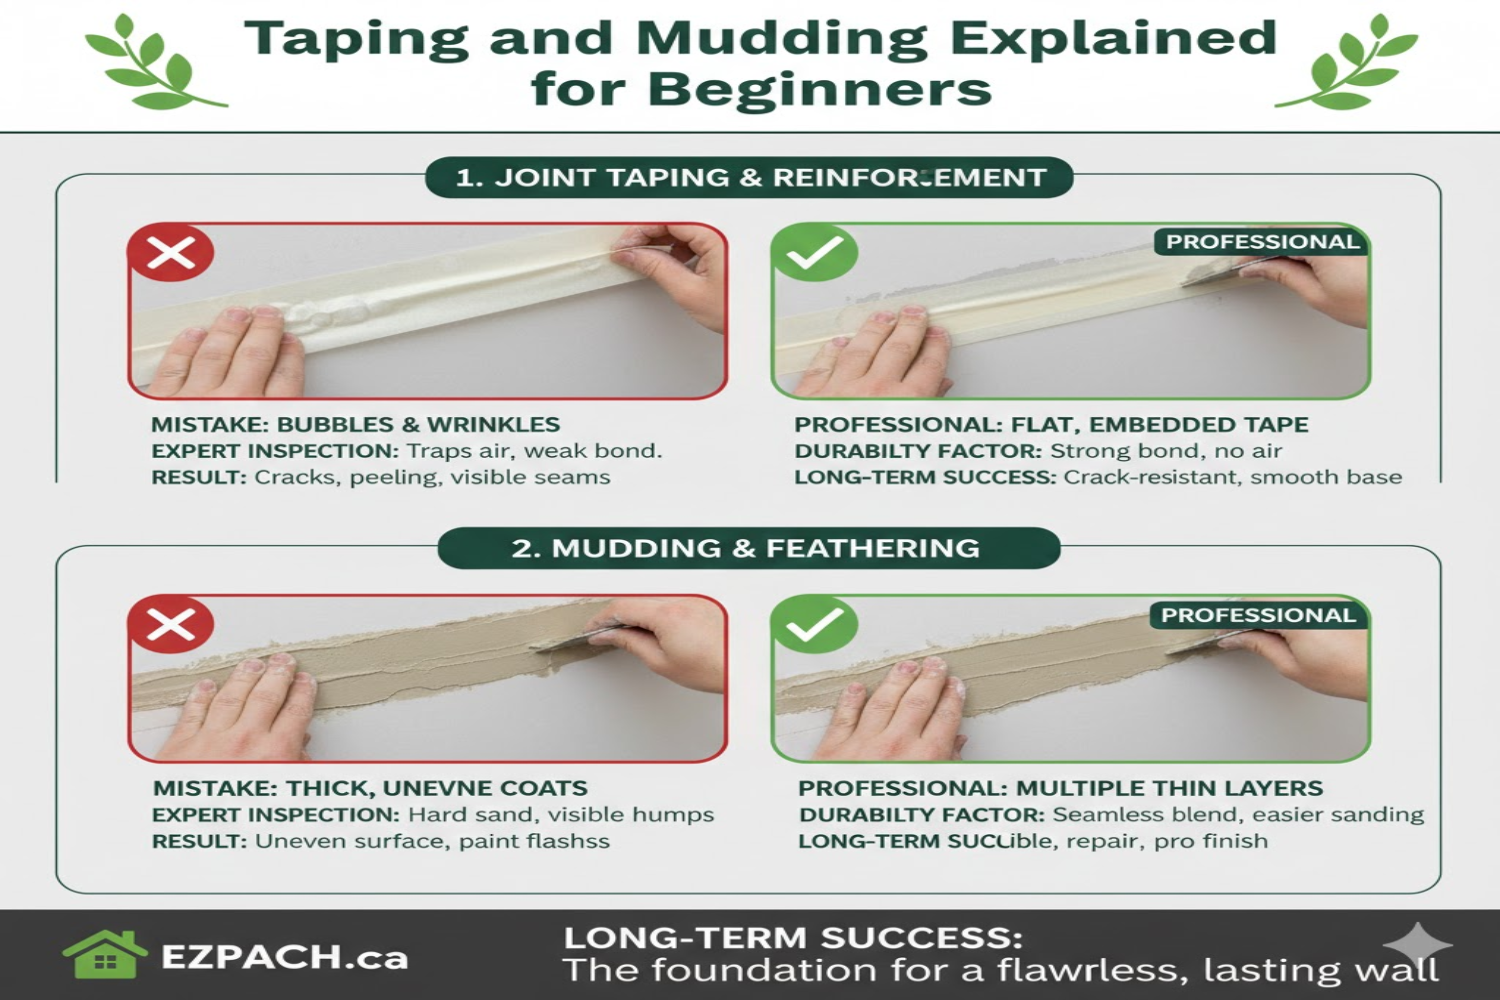
Taping & Mudding
Smooth, paint-ready wall finishes by expert drywall finishers.
Plaster Repair Experts
Precision plaster repair services while maintaining original wall texture.
Water Damage Repair
Drywall and ceiling restoration for properties affected by water damage.
Texture Matching
Accurate texture blending so repaired areas match existing finishes.
Installation, Repair & Removal
End-to-end drywall installation, repair, and removal solutions.