Preserving the authentic character of historic homes requires attention to every detail, especially when it comes to wall and ceiling textures. Matching textures in repairs or renovations ensures a seamless appearance that honors the home’s original craftsmanship. Without proper techniques, even minor repairs can stand out and diminish the home’s historic charm.
Texture matching involves understanding the original materials, application methods, and patterns used in the home. Skilled techniques allow homeowners to blend new repairs with existing surfaces effortlessly. By learning the correct approach, you can restore walls and ceilings while maintaining historical integrity.
Understanding Historic Home Textures
Historic homes often feature unique plaster textures, such as knockdown, skip trowel, or swirl finishes. Each texture reflects the period and the craftsmanship style used during construction. Understanding the specific type of texture is the first step in achieving a flawless match.
Texture imperfections, while minor, can drastically affect the authenticity of the repair. Before attempting any work, study the existing patterns carefully. Take notes and photographs to guide your repair process.
Common Texture Types
- Knockdown: A flattened, mottled pattern achieved with a trowel or knife.
- Skip Trowel: Rough, slightly raised texture with a skipped trowel application.
- Swirl: Circular patterns applied with brushes or combs.
- Popcorn or Acoustic: Often found in mid-20th-century homes, creating bumpy surfaces.
Tools and Materials Needed
Proper tools and materials are essential for effective texture matching. Using the wrong tools can make the repair obvious and inconsistent.
Essential Tools
- Trowels and drywall knives of various sizes
- Brushes, sponges, or combs for creating patterns
- Hopper gun or texture sprayer for spray textures
- Sandpaper or sanding blocks for smoothing edges
- Drop cloths and protective covers for floors and furniture.
Materials
- Joint compound or plaster matching the original formula
- Water and mixing containers
- Texture additive, as if required for historical accuracy
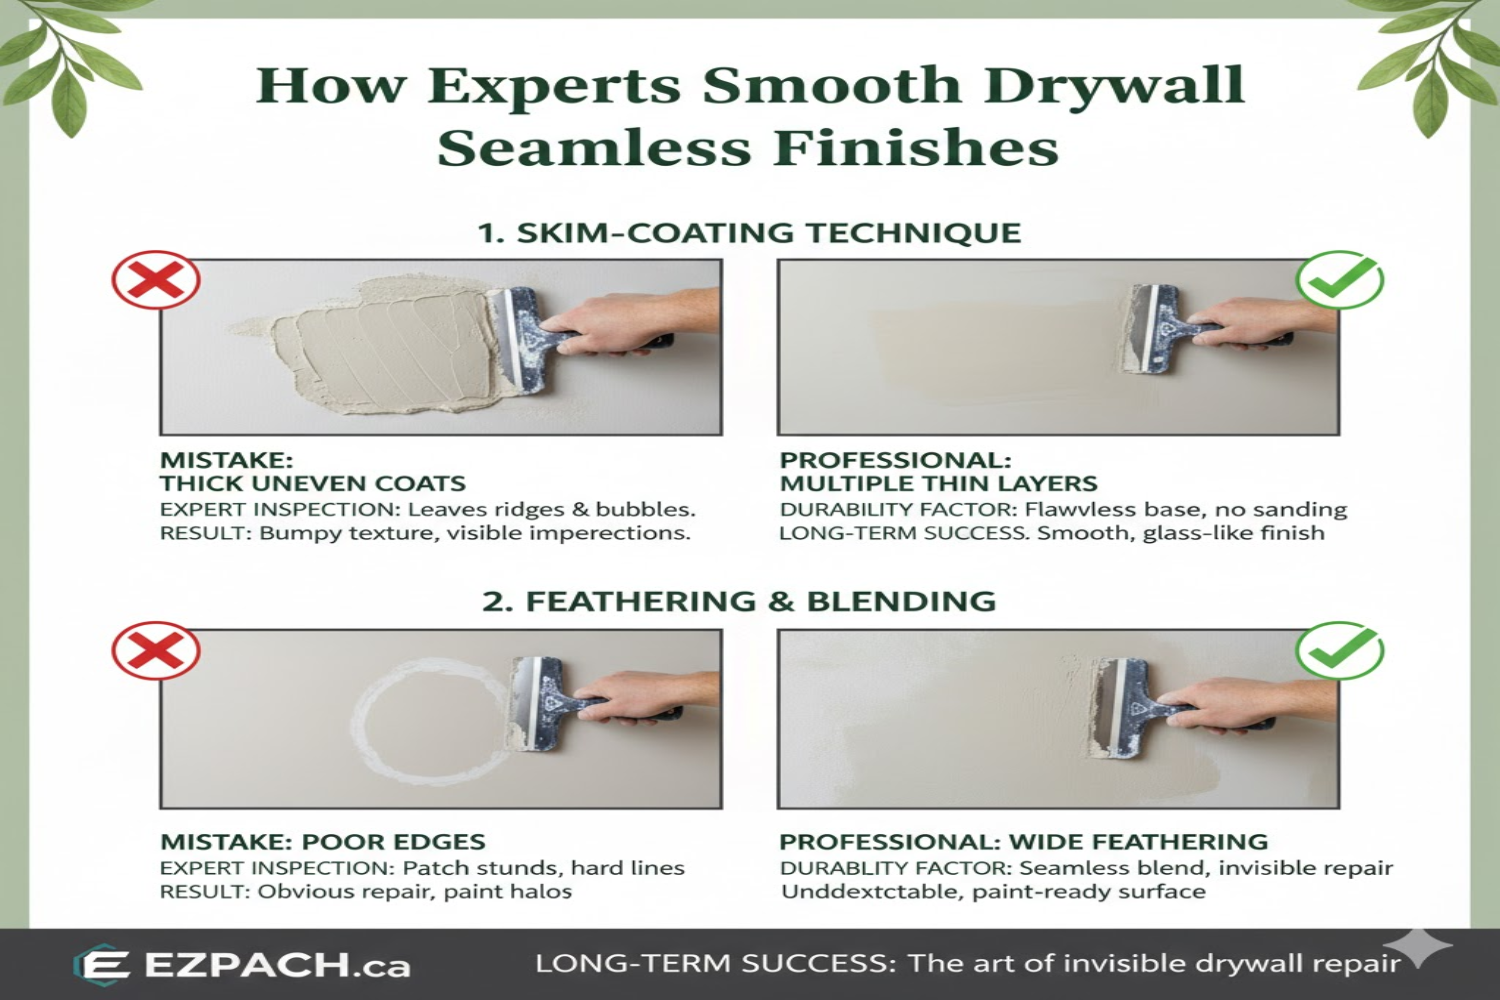
Step-by-Step Texture Matching Techniques
Matching texture in historic homes requires patience and practice. Following a structured approach ensures a professional-looking repair.
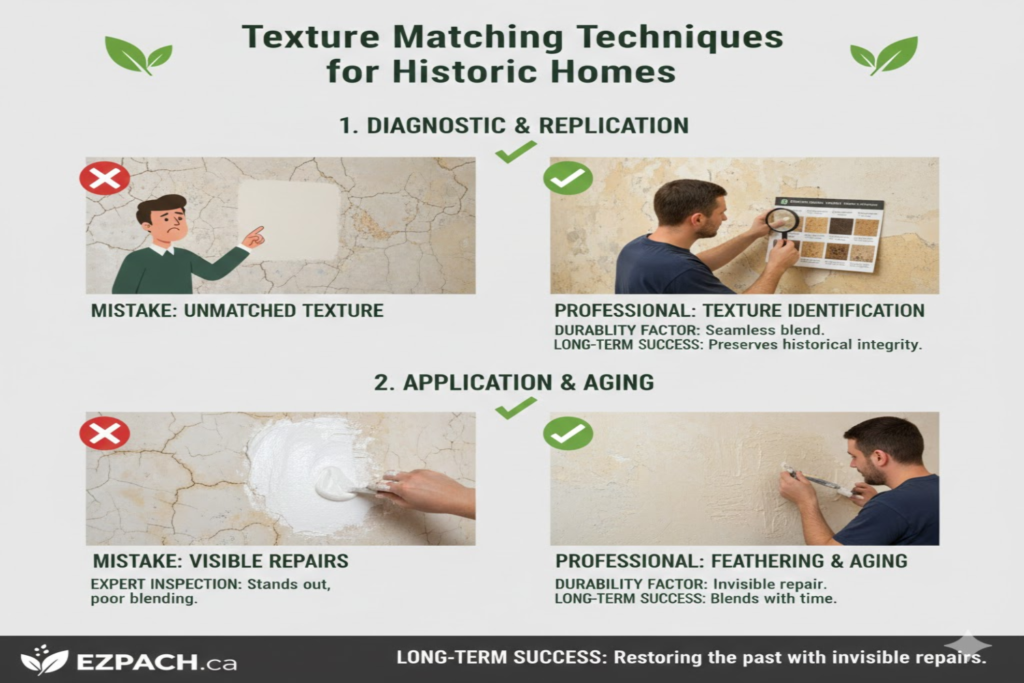
Step 1: Assess the Existing Texture
Determine the type, depth, and pattern of the existing texture. Tap the wall lightly to detect thickness variations and observe how light reflects on the surface. Documenting the texture with photos helps during the replication process.
Step 2: Prepare the Surface
Clean the area and remove loose debris. Sand any rough edges of the damaged area to ensure proper adhesion. Mask off surrounding surfaces to prevent accidental texture application on untouched walls.
Step 3: Mix and Test Compound
Prepare joint compound or plaster to match the original material’s consistency. Test a small section on a scrap board or an inconspicuous area. Adjust thickness or additives until the test patch blends seamlessly with the existing texture.
Step 4: Apply Base Layer
For deeper textures, apply a base coat to fill holes or cracks. Smooth edges to blend with surrounding surfaces. Allow the base layer to dry completely before applying the patterned texture.
Step 5: Recreate the Texture
Use brushes, trowels, or sprayers to mimic the existing pattern. Work in small sections to maintain consistency. Feather edges carefully to blend new texture into old, avoiding abrupt transitions
Advanced Techniques for Historic Accuracy
Some historic textures require specialized approaches to match patterns perfectly.
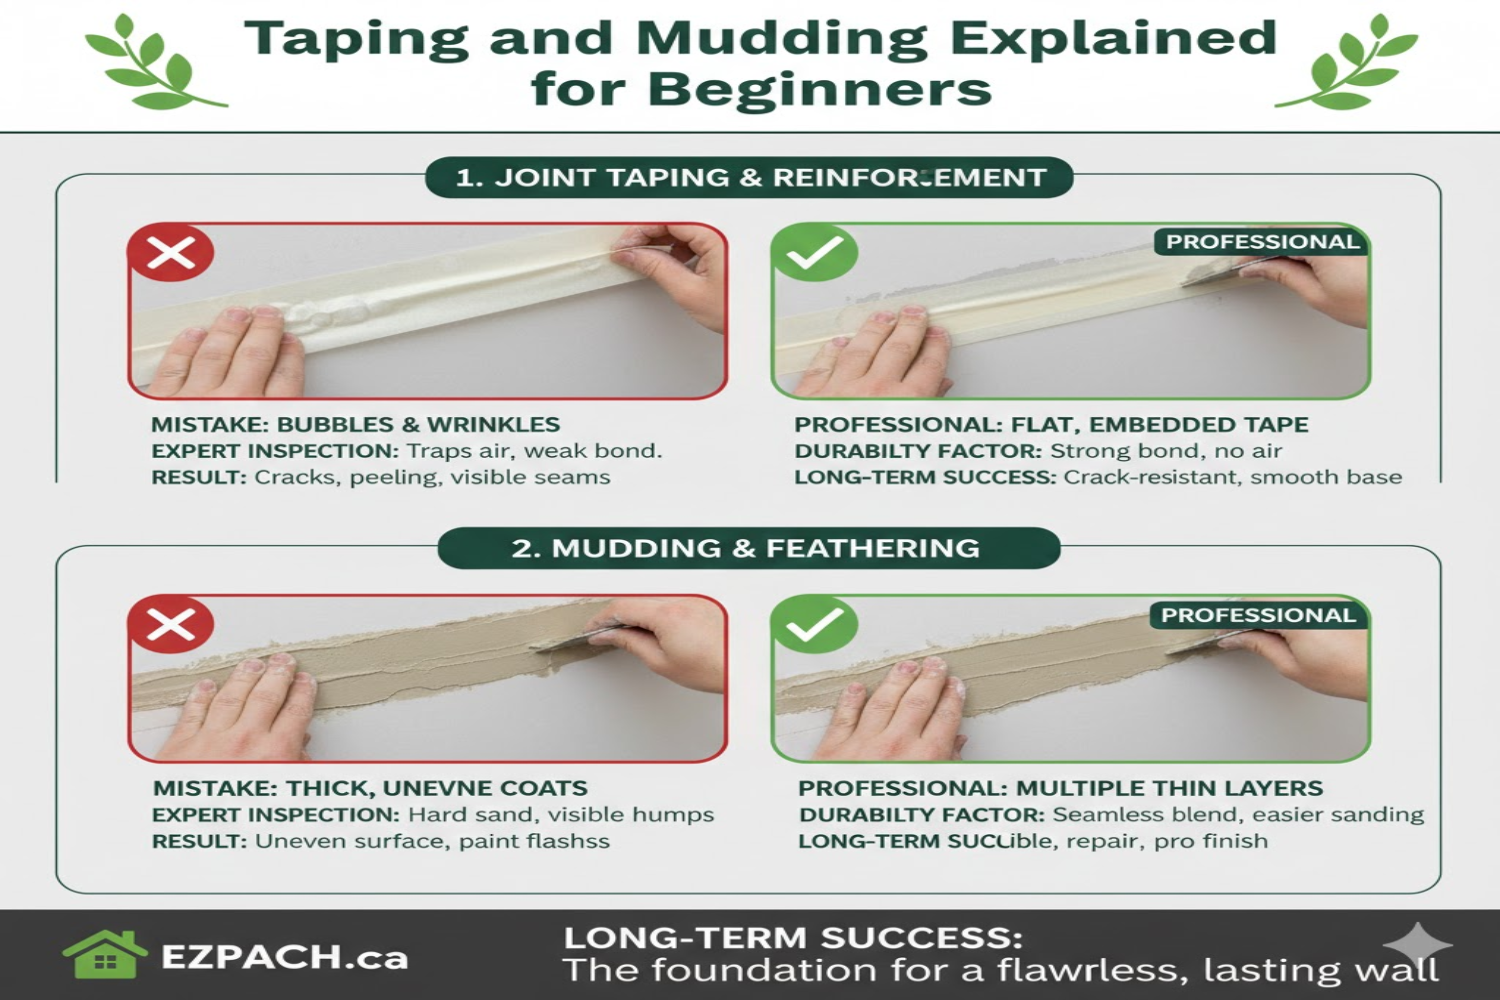
Layered Application
Many historic finishes involve multiple layers. Apply compound in thin layers, allowing each to dry partially before adding the next. Layering enhances depth and replicates original craftsmanship.
Custom Tools
Craft custom trowels or combs to match unusual patterns. Antique homes often feature textures that modern tools cannot replicate accurately. Small modifications or DIY tools may be necessary.
Spray vs. Hand Techniques
Determine whether the original texture was sprayed or hand-applied. Using the same method ensures a more authentic match. Spray textures often require a hopper gun, while hand-applied finishes rely on trowel or brush movements.
Common Challenges in Texture Matching
Even experienced renovators face obstacles when working with historic textures.
- Inconsistent original patterns: Old textures may have faded or worn unevenly.
- Material incompatibility: Modern joint compounds may not behave like historic plaster.
- Surface irregularities: Older walls may have underlying damage, complicating texture application.
- Color differences: Even perfectly matched textures can stand out if the paint is not blended properly.
Cost of Texture Matching for Historic Homes
The cost of matching historic textures varies depending on size, complexity, and labor requirements. Minor repairs may be inexpensive, while large-scale restoration can be significant.
| Project Type | Average DIY Cost | Professional Cost |
| Small patch (1–2 sq. ft.) | $20–$50 | $75–$150 |
| Medium area (5–10 sq. ft.) | $50–$100 | $150–$300 |
| Full wall or ceiling replication | $150–$300 | $400–$800 |
| Specialty finishes (swirl/skip trowel) | $200–$500 | $500–$1,200 |
Tips for Seamless Blending
Blending new texture into old requires careful technique:
Feathering Edges
Feather the edges of the repair to reduce noticeable transitions. Use a trowel or sponge to gradually blend the compound into surrounding areas.
Color Matching
Apply a matching primer or paint over the repaired texture. Slight variations in compound color can be hidden with appropriate topcoats.
Practice Sections
Test techniques on spare boards or hidden corners before attempting the visible repair. This practice reduces errors and improves final results.
Preventing Future Damage
Maintaining textures in historic homes prevents repeated repairs.
- Keep walls dry to avoid moisture-related cracking.
- Avoid impacts or abrasion on delicate textures.
- Perform regular inspections for signs of wear.
- Clean gently to prevent surface erosion.
Specialty Materials for Historic Accuracy
Certain materials can replicate historic textures more accurately than standard joint compound.
Lime Plaster
Common in older homes, lime plaster provides flexibility and an authentic finish.
Gypsum-Based Compounds
Modern gypsum plaster can mimic traditional textures with the right additives.
Additives and Fibers
Incorporate fibers or sand to replicate original surface characteristics. This enhances both appearance and durability.
Conclusion
Texture matching in historic homes is both an art and a science. Understanding the original materials, techniques, and patterns ensures repairs blend seamlessly. Patience, careful assessment, and the right tools are critical to maintaining the home’s authenticity.
With proper planning and execution, homeowners can restore damaged areas while preserving the historic character of their walls and ceilings. By employing advanced techniques, specialty materials, and careful finishing, repairs become virtually invisible and maintain the charm of a bygone era.
FAQs
1. Can I match historic textures myself?
Yes, minor repairs can be done by homeowners, but complex textures may require professional expertise.
2. How do I know what texture my historic home has?
Inspect the surface carefully and take photos; compare with common historic texture patterns.
3. Can modern joint compound replicate old plaster?
With the right additives and techniques, modern compounds can closely match historic plaster.
4. How long does texture repair take to dry?
Drying time depends on thickness, typically 24–48 hours per layer.
5. Do I need special tools for swirl or skip trowel textures?
Custom or modified tools are often needed to replicate unique historic patterns.
6. Will paint hide texture differences?
Paint can help blend minor differences, but cannot compensate for incorrectly matched patterns.
7. Is lime plaster necessary for all historic homes?
Not always; use it when the original construction used lime-based materials for authenticity.
8. Can texture matching increase home value?
Yes, preserving historic authenticity enhances both aesthetic and market value.
Drywall Repair Halifax
EZ Patch offers clean, professional drywall, ceiling, plaster, and water damage repair services in Halifax with minimal mess and long-lasting results.
EZ Patch – Drywall Repair Experts
Trusted drywall repair professionals serving Halifax and nearby areas.
Drywall Patch & Repair
Seamless drywall repairs for holes, cracks, dents, and damaged walls.
Ceiling Repairs
Professional ceiling repair services for stains, cracks, and water damage.
Drywall Installation
Complete drywall installation services for renovations and new builds.
Taping & Mudding
Smooth, paint-ready wall finishes by expert drywall finishers.
Plaster Repair Experts
Precision plaster repair services while maintaining original wall texture.
Water Damage Repair
Drywall and ceiling restoration for properties affected by water damage.
Texture Matching
Accurate texture blending so repaired areas match existing finishes.
Installation, Repair & Removal
End-to-end drywall installation, repair, and removal solutions.