Plaster lath walls, common in homes built before the 1950s, offer a classic charm that modern drywall often lacks. Over time, however, these walls can develop cracks, holes, and other forms of damage, affecting both aesthetics and structural integrity. Understanding how to repair plaster lath walls is essential for maintaining the beauty and safety of your home.
Repairing plaster lath walls requires patience, the right materials, and proper technique. Unlike drywall, plaster is more brittle and demands careful handling to avoid further damage. With the right approach, even DIY enthusiasts can restore their walls to a smooth, durable finish that complements the historic character of their home.
Common Issues in Plaster Lath Walls
Plaster lath walls are prone to several problems due to their age and construction methods. Cracks often form around doors, windows, and ceilings due to settling or moisture. Small holes or chips can result from accidental impacts or the removal of old fixtures.
Another frequent issue is plaster delamination, where the plaster separates from the wooden laths behind it. This can cause sagging or hollow-sounding spots on the wall. Early detection and repair prevent more extensive damage and costly renovations.
Cracks in Plaster
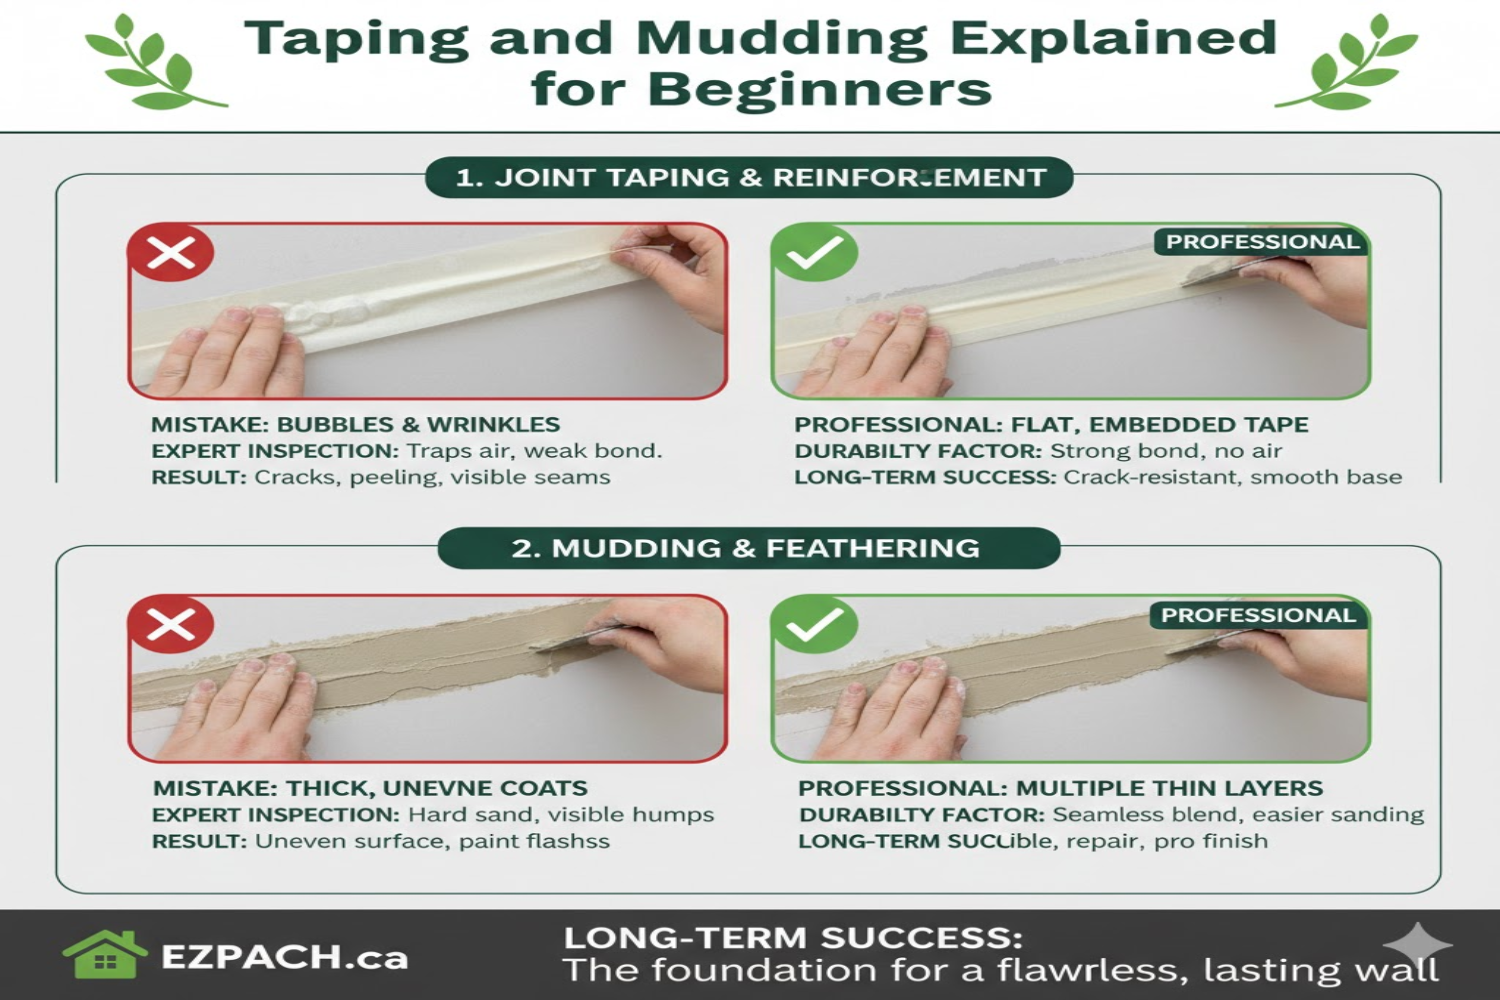
Cracks usually appear as thin lines and are often cosmetic, but ignoring them can lead to larger structural issues. Hairline cracks can be filled with a patching compound, while larger cracks may require reinforcing tape. Consistent monitoring ensures minor issues don’t escalate.
Loose or Sagging Plaster
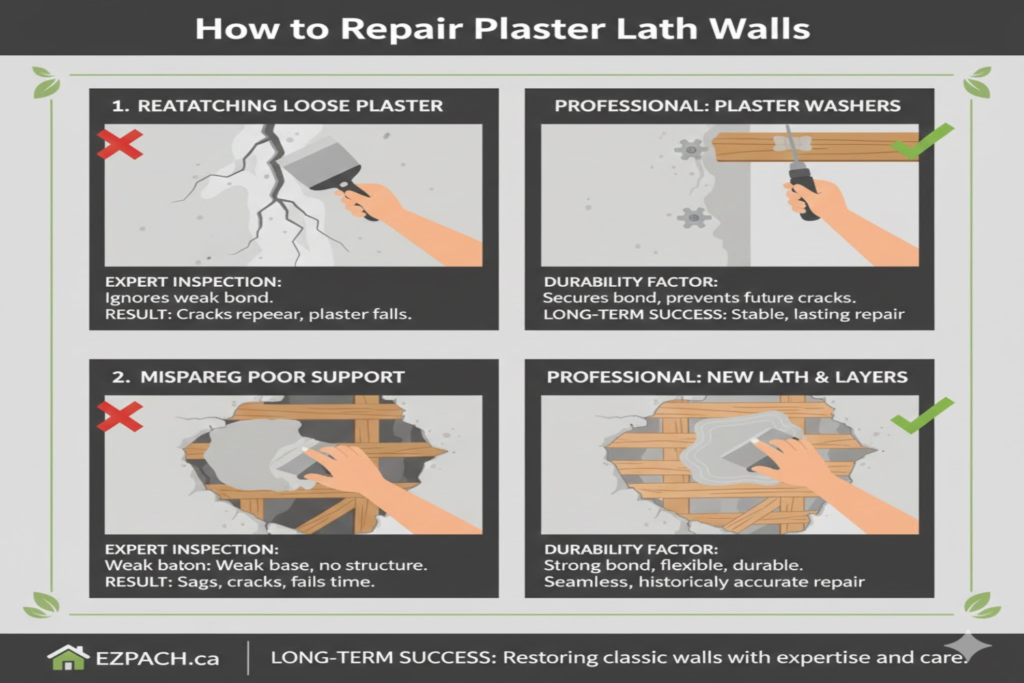
Sagging areas occur when plaster loses adhesion from the lath. This often happens in older homes with moisture exposure. Small sections can be re-secured with plaster washers and screws for stability.
Holes and Chips
Holes from nails or minor accidents are common. For small holes, a simple filler is sufficient, while larger holes need a lath patch or mesh support. Proper finishing ensures a seamless look with the surrounding wall.
Water Damage Effects
Moisture can cause plaster to swell, discolor, and crumble. It’s crucial to identify and resolve leaks before repairing the plaster. Using moisture-resistant materials can prevent future deterioration.
Tools and Materials Needed for Plaster Repair
Repairing plaster lath walls requires specialized tools and materials that differ from drywall repair. Having the right setup ensures the repair is durable and looks professional.
- Plaster mix: Choose a setting-type or ready-mix plaster suitable for lath walls.
- Joint compound: For finishing and smoothing surfaces.
- Plaster washers and screws: To secure loose plaster.
- Mesh tape or lath strips: For patching larger holes.
- Putty knife and trowel: Essential for applying and smoothing plaster.
- Sandpaper: To achieve a smooth finish.
- Primer and paint: For final wall finishing.
These materials allow both minor and major repairs while maintaining the historic integrity of the walls.
Step-by-Step Guide to Repairing Plaster Lath Walls
Repairing plaster lath walls is a detailed process that requires attention to detail and patience. Following a structured approach ensures long-lasting results.
Assessing the Damage
Begin by inspecting the wall for cracks, holes, and loose plaster. Tap the wall lightly to identify hollow spots. Documenting the affected areas helps in planning your repair process.
Preparing the Wall
Clean the wall surface and remove loose debris. Dust or dirt can prevent plaster adhesion, leading to further damage. Cover surrounding areas to protect floors and furniture.
Fixing Small Cracks
Small cracks can be filled with a joint compound or plaster patch. Apply the compound with a putty knife and smooth the surface. Sand lightly after drying for a seamless finish.
Repairing Holes and Large Cracks
For holes larger than ½ inch, install a mesh or lath backing. Apply plaster in layers, allowing each layer to set before applying the next. Feather the edges for a smooth transition.
Securing Loose Plaster
Use plaster washers and screws to reattach sagging sections. Drill small pilot holes and carefully tighten the washers without cracking the plaster. Reapply plaster over the secured area for a uniform appearance.
Finishing and Painting
After repairs dry completely, sand the wall to remove imperfections. Apply a primer suitable for plaster, followed by your chosen paint. This final step ensures durability and a polished look.
Tips for Successful Plaster Repairs
Repairing plaster lath walls can be tricky, but certain techniques increase your chances of success.
- Work in small sections to avoid cracking.
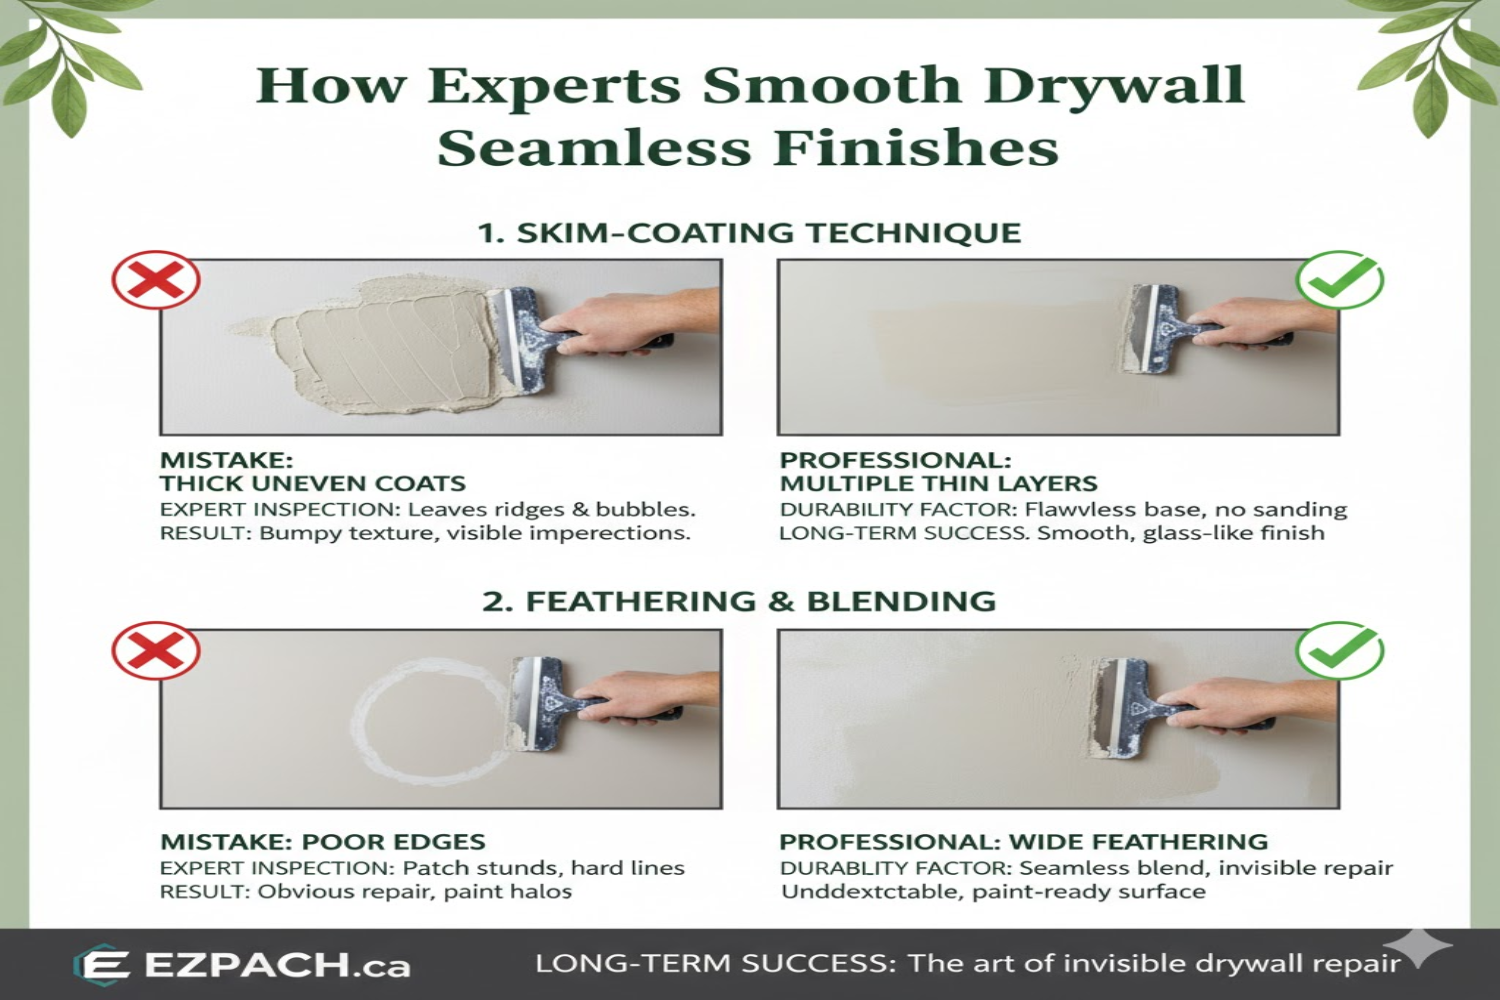
- Use multiple thin layers instead of one thick layer of plaster.
- Feather edges to blend repairs into the existing wall.
- Avoid sanding too aggressively to prevent damage.
- Keep tools clean to maintain smooth finishes.
Cost of Plaster Lath Wall Repair
Repairing plaster lath walls varies depending on the extent of damage and labor involved. Minor crack repairs are inexpensive, while large-scale restorations can be more costly. On average, DIY repairs cost between $50–$200, whereas professional services can range from $300–$1,200.
| Repair Type | Estimated Cost (DIY) | Estimated Cost (Professional) |
| Small cracks | $50–$100 | $150–$300 |
| Holes & chips | $75–$200 | $200–$500 |
| Large repairs / sagging plaster | $150–$300 | $500–$1,200 |
| Water damage repair | $100–$250 | $400–$1,000 |
This table helps homeowners budget effectively for plaster lath wall repairs.
Preventing Future Damage
Maintaining plaster lath walls prevents costly repairs. Address leaks, control humidity, and avoid heavy impacts on walls. Regular inspections help detect minor issues before they escalate.
Moisture Management
Excess moisture is the leading cause of plaster damage. Install proper ventilation in bathrooms and kitchens. Use dehumidifiers in areas prone to dampness.
Structural Stability
Ensure the wall framing remains stable. Settling or shifting foundations can cause new cracks. Addressing structural issues early protects the plaster.
Proper Wall Usage
Avoid hanging heavy objects without proper anchors. Even small nails can cause cracking over time. Use plaster-specific fasteners to minimize damage.
Common Mistakes to Avoid
Even experienced DIYers can make mistakes that compromise plaster repair quality.
- Applying plaster too thickly causes cracking.
- Neglecting to secure loose plaster results in future sagging.
- Skipping the primer before painting reduces adhesion.
- Ignoring moisture issues leads to recurring damage.
Finishing Techniques for a Seamless Look
Achieving a flawless wall requires attention to finishing techniques. Sanding, layering, and proper priming create a professional result. Blending new plaster with existing textures ensures consistency.
Sanding Tips
Sand lightly using fine-grit sandpaper. Avoid aggressive sanding that exposes lath. Smooth surfaces prepare the wall for primer and paint.
Layering Plaster
Apply plaster in thin, even layers. Allow each layer to dry completely before the next. Layering reduces cracking and ensures durability.
Blending Textures
Match existing wall textures using trowels or brushes. Feather edges carefully for seamless integration. This step preserves the original look of your plaster walls.
Conclusion
Repairing plaster lath walls may seem intimidating, but with proper tools, techniques, and patience, it is achievable. Addressing cracks, holes, and sagging early prevents more serious structural damage. Homeowners can restore both functionality and beauty to their walls with careful attention and persistence.
Regular maintenance and proactive inspections significantly prolong the life of plaster walls. Following the step-by-step guide ensures repairs are long-lasting and blend seamlessly with existing surfaces. By investing time and effort, you preserve the historic charm and durability of your home for years to come.
FAQs
1. Can I repair plaster lath walls myself?
Yes, minor repairs like small cracks and chips can be done by DIYers using the proper tools. For larger structural issues, professional help is recommended.
2. How long does plaster repair take to dry?
Drying time varies depending on layer thickness and humidity, typically 24–48 hours per layer.
3. Is plaster lath stronger than drywall?
Plaster lath is denser and more durable, but also more brittle. Proper handling is essential during repairs.
4. Can I paint directly over plaster repair?
No, always apply a primer to ensure paint adheres properly.
5. How do I stop plaster from cracking again?
Use multiple thin layers, feather edges, and address any structural or moisture issues.
6. Do I need special plaster for lath walls?
Yes, setting-type plaster is ideal for lath walls as it bonds better than drywall compounds.
7. Can water-damaged plaster be salvaged?
Minor water damage can be repaired, but extensive damage may require partial wall replacement.
8. Are plaster washers necessary for every repair?
Only for loose or sagging plaster; small cracks and cosmetic holes don’t require them.
Drywall Repair Halifax
EZ Patch offers clean, professional drywall, ceiling, plaster, and water damage repair services in Halifax with minimal mess and long-lasting results.
EZ Patch – Drywall Repair Experts
Trusted drywall repair professionals serving Halifax and nearby areas.
Drywall Patch & Repair
Seamless drywall repairs for holes, cracks, dents, and damaged walls.
Ceiling Repairs
Professional ceiling repair services for stains, cracks, and water damage.
Drywall Installation
Complete drywall installation services for renovations and new builds.
Taping & Mudding
Smooth, paint-ready wall finishes by expert drywall finishers.
Plaster Repair Experts
Precision plaster repair services while maintaining original wall texture.
Water Damage Repair
Drywall and ceiling restoration for properties affected by water damage.
Texture Matching
Accurate texture blending so repaired areas match existing finishes.
Installation, Repair & Removal
End-to-end drywall installation, repair, and removal solutions.