Preparing a ceiling for painting after repair is one of the most important steps in achieving a smooth, professional-looking finish. Many homeowners rush into painting without proper preparation, which often results in visible patches, uneven texture, or peeling paint. Understanding how to prepare your ceiling for painting after repair ensures that your hard repair work does not go to waste.
After repairing cracks, holes, or water damage, the ceiling surface needs special attention before paint is applied. Even small imperfections can become highly noticeable once the paint dries. This guide explains every step in detail so you can achieve long-lasting, flawless results.
Why Proper Ceiling Preparation Matters After Repair
Proper ceiling preparation ensures that paint adheres evenly and looks consistent across the entire surface. Without preparation, repaired areas may absorb paint differently, causing visible blotches. This can ruin the overall appearance of the room.
Preparation also improves durability. Paint applied to a poorly prepared ceiling is more likely to peel, crack, or discolor. Learning how to prepare your ceiling for painting after repair saves time, money, and frustration in the long run.
What Tools and Materials Are Needed for Ceiling Preparation?
Before starting, gathering the right tools and materials is essential. Using the correct supplies makes the process smoother and more efficient. Poor-quality tools can negatively affect the final finish.
Common tools include sanding equipment, cleaning supplies, primers, and protective coverings. Having everything ready prevents interruptions during preparation. Preparation begins long before the first coat of paint.
How to Inspect the Repaired Ceiling Area
Inspecting the ceiling after repair helps identify remaining imperfections. Even well-done repairs can leave uneven surfaces or fine cracks. A close inspection ensures nothing is overlooked.
Use proper lighting to spot flaws. Look at the ceiling from multiple angles. Any visible imperfections should be addressed before painting begins.
How to Clean the Ceiling After Repair
Cleaning removes dust, debris, and residue left behind from repairs. Dust particles can prevent paint from adhering properly. A clean surface ensures smooth application.
Use a soft brush or vacuum to remove loose debris. Follow up with a damp cloth or mild cleaning solution. Allow the ceiling to dry completely before moving to the next step.
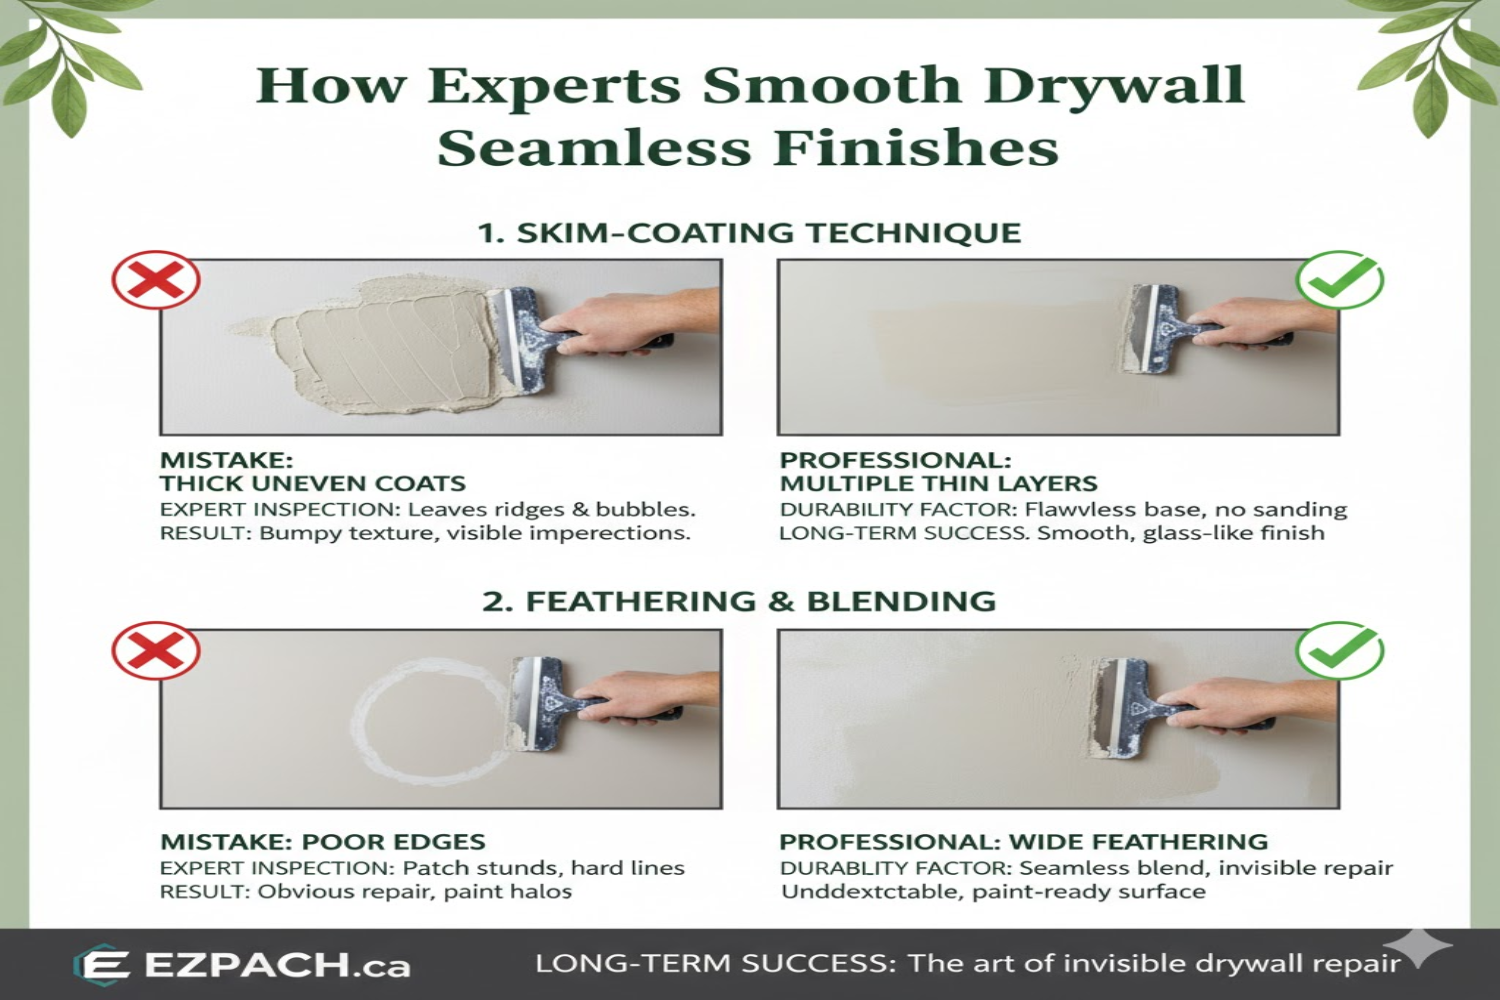
How to Sand the Ceiling for a Smooth Finish
Sanding blends repaired areas with the surrounding ceiling surface. This step is crucial for eliminating ridges, bumps, and uneven texture. Proper sanding creates a uniform surface.
Use fine-grit sandpaper for best results. Avoid aggressive sanding that could damage the repair. Smooth transitions are key when learning how to prepare your ceiling for painting after repair.
How to Address Uneven Texture on the Ceiling
Uneven texture is common after ceiling repairs. Matching the existing texture helps maintain a consistent appearance. Texture differences become obvious after painting.
Matching Existing Ceiling Texture
Ceiling textures vary from smooth to popcorn or knockdown. Identify the existing texture before proceeding. Use matching tools or sprays for consistency.
Blending Repaired Areas
Blend edges carefully to avoid visible repair lines. Gradual transitions work best. This prevents patchy results.
Testing Texture Before Painting
Test texture on a small area first. This allows adjustments before full application. Testing saves time and materials.
How to Fix Minor Imperfections Before Painting
Minor imperfections such as pinholes or hairline cracks should be fixed before painting. These flaws become more visible once the paint dries. Addressing them early improves the final finish.
Apply lightweight joint compound as needed. Smooth and sand the area gently. Reinspect after drying to ensure perfection.
How to Prime the Ceiling After Repair
Priming is one of the most critical steps in ceiling preparation. Primer seals repaired areas and creates a uniform surface for paint. Skipping primer often leads to uneven color.
Use a high-quality primer designed for ceilings. Apply evenly and allow proper drying time. Priming is essential when learning how to prepare your ceiling for painting after repair.
Why Moisture Control Is Important Before Painting
Moisture trapped in repaired areas can cause paint failure. Water-damaged ceilings must be completely dry before painting. Moisture issues can reappear if ignored.
Use moisture meters if needed. Ensure leaks are fully repaired. Proper drying prevents future problems.
How to Choose the Right Paint for Ceilings
Ceiling paint differs from wall paint in formulation. It is designed to reduce drips and hide imperfections. Choosing the right paint improves results.
Flat or matte finishes are commonly recommended. They minimize light reflection. Proper paint selection complements preparation efforts.
How Lighting Affects Ceiling Painting Results
Lighting plays a major role in how ceiling paint appears. Poor lighting can hide flaws during painting. Once lighting changes, imperfections may appear.
Use bright, even lighting during preparation. Inspect the ceiling under natural and artificial light. This ensures consistent results.
How Long Should You Wait After Repair Before Painting?
Timing is critical after ceiling repairs. Painting too soon can trap moisture or cause cracks to reappear. Patience improves durability.
Allow repairs and primer to fully cure. Follow manufacturer recommendations. Rushing leads to repainting later.
Common Mistakes to Avoid When Preparing a Ceiling
Avoiding mistakes improves final results. Many issues arise from skipped steps or poor materials. Awareness prevents costly errors.
Common mistakes include skipping primer, insufficient sanding, and poor cleaning. Each step matters. Attention to detail is essential.
How to Prepare Textured Ceilings After Repair
Textured ceilings require special preparation. Repairs often disturb texture patterns. Restoring texture ensures a uniform look.
Popcorn Ceiling Preparation
Popcorn ceilings require careful handling. A disturbing texture can cause uneven areas. Use matching repair techniques.
Knockdown Texture Preparation
Knockdown textures need blending after repair. Smooth transitions are important. Test texture before painting.
Smooth Ceiling Preparation
Smooth ceilings require flawless sanding. Imperfections are more visible. Precision is key.
How to Ensure Long-Lasting Paint Results
Long-lasting paint results depend on preparation quality. Proper cleaning, sanding, and priming extend paint life. Skipping steps reduces durability.
Consistent preparation improves adhesion. It also reduces maintenance needs. Preparation is an investment.
Key Steps to Prepare Your Ceiling for Painting After Repair
Following a structured approach ensures success.
Essential Preparation Steps:
- Inspect and clean the repaired ceiling thoroughly
- Sand all repaired and surrounding areas evenly.
- Fix minor imperfections before priming.
- Apply a high-quality ceiling primer.
- Allow sufficient drying time before painting.
Conclusion
Ceiling preparation is not just a preliminary step—it is the foundation of a flawless paint job. Repairs alone are not enough without proper finishing steps. Preparation bridges the gap between repair and beauty.
Learning how to prepare your ceiling for painting after repair saves time, money, and effort. With the right approach, your ceiling will look smooth, clean, and professionally painted for years to come.
FAQs
1. Can I paint my ceiling without priming after repair?
Priming is strongly recommended to prevent uneven color and poor adhesion.
2. How do I know if my ceiling is dry enough to paint?
The surface should feel completely dry and cool with no visible moisture.
3. Should I sand the entire ceiling or just the repaired areas?
Light sanding across the entire ceiling helps ensure uniform texture.
4. What grit sandpaper is best for ceiling preparation?
Fine-grit sandpaper, such as 120–220 grit, works best.
5. Can ceiling repairs show through paint later?
Yes, if preparation is poor, repaired areas may become visible over time.
6. Is ceiling paint different from wall paint?
Yes, ceiling paint is formulated to reduce drips and hide imperfections.
7. How many primer coats are needed after repair?
Usually, one coat is sufficient, but heavily repaired areas may need two.
8. Can lighting affect how my ceiling paint looks?
Yes, lighting can highlight imperfections, making preparation crucial.
Drywall Repair Halifax
EZ Patch offers clean, professional drywall, ceiling, plaster, and water damage repair services in Halifax with minimal mess and long-lasting results.
EZ Patch – Drywall Repair Experts
Trusted drywall repair professionals serving Halifax and nearby areas.
Drywall Patch & Repair
Seamless drywall repairs for holes, cracks, dents, and damaged walls.
Ceiling Repairs
Professional ceiling repair services for stains, cracks, and water damage.
Drywall Installation
Complete drywall installation services for renovations and new builds.
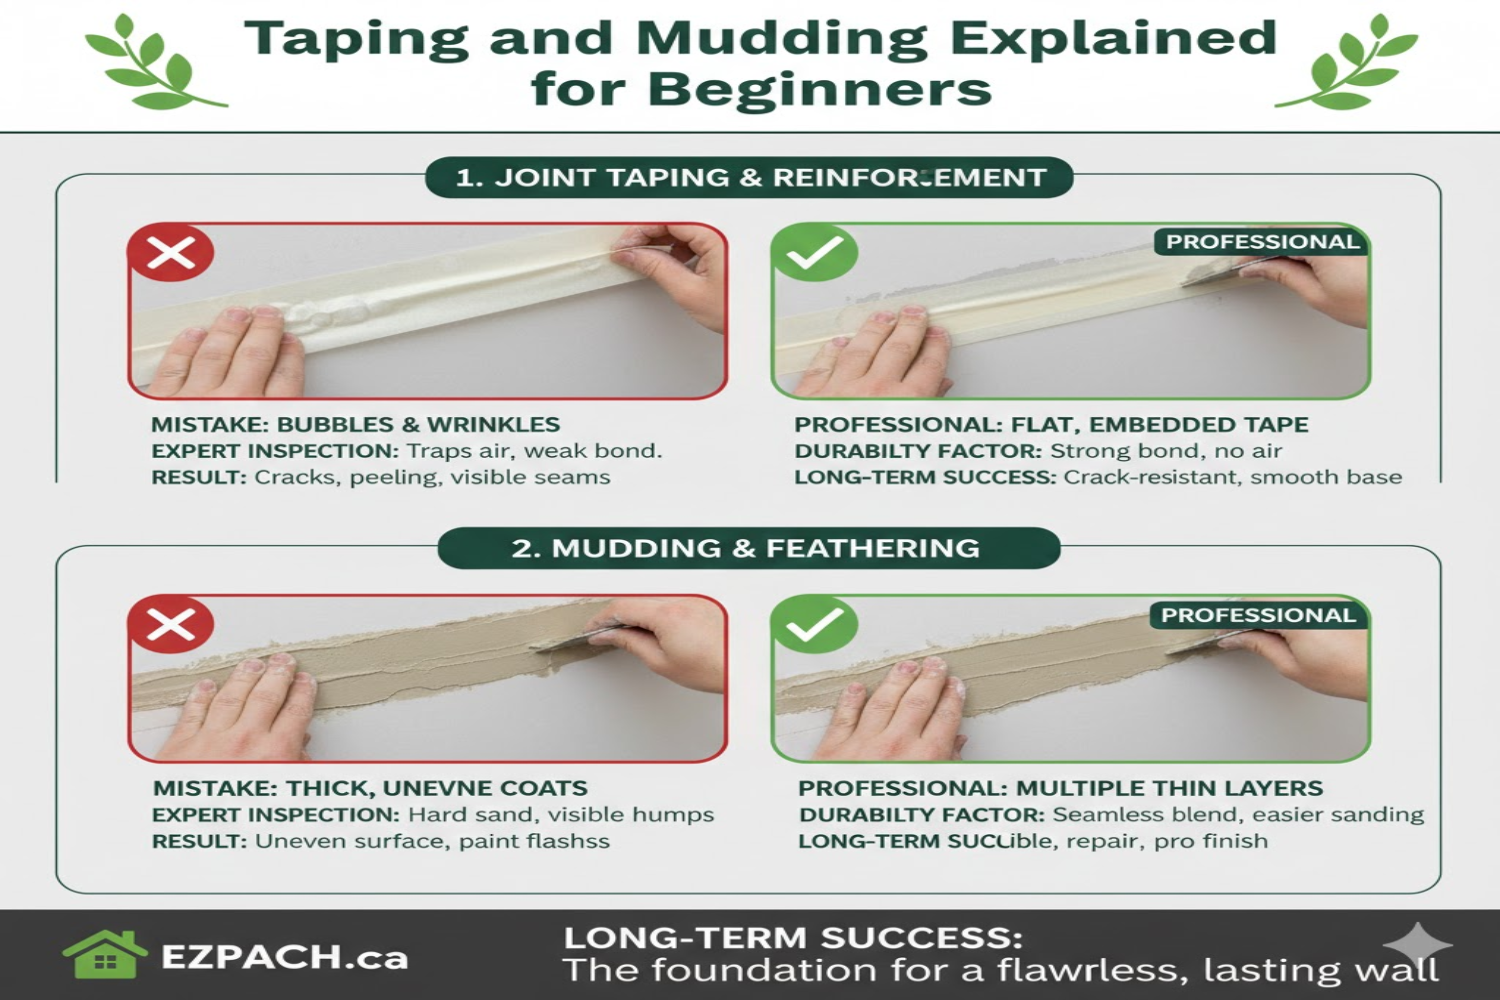
Taping & Mudding
Smooth, paint-ready wall finishes by expert drywall finishers.
Plaster Repair Experts
Precision plaster repair services while maintaining original wall texture.
Water Damage Repair
Drywall and ceiling restoration for properties affected by water damage.
Texture Matching
Accurate texture blending so repaired areas match existing finishes.
Installation, Repair & Removal
End-to-end drywall installation, repair, and removal solutions.