Drywall finishing is more than just smoothing walls; it is a precise process that ensures durability, aesthetics, and long-term performance. Contractors follow industry-recognized standards to achieve flawless results in residential and commercial spaces. These standards dictate the materials, techniques, and finish levels required to meet both functional and visual requirements.
Proper drywall finishing also affects insulation, soundproofing, fire resistance, and paint adhesion. By adhering to established standards, contractors reduce the risk of future issues such as cracking, peeling, or uneven surfaces, providing walls that are visually appealing and structurally sound.
What Are Drywall Finishing Standards?
Drywall finishing standards are formal guidelines that outline how walls and ceilings should be prepared, patched, smoothed, and finished. They provide contractors with a framework for achieving consistent quality across different projects. Standards also specify which materials, techniques, and levels of finish should be applied depending on the intended use of the space.
These guidelines prevent common problems like uneven surfaces, visible seams, and poor paint adhesion. Contractors rely on finishing standards to determine the number of joint compound layers, sanding methods, and proper priming, ensuring each wall meets both functional and aesthetic expectations.
Understanding the Purpose of Standards
The primary purpose of drywall finishing standards is to ensure uniformity in quality. Adhering to these standards reduces the likelihood of cracks, uneven surfaces, and visible seams. By following these guidelines, contractors can produce walls that look flawless and remain durable for years.
Scope of Standards
Standards cover residential, commercial, and industrial applications. They dictate material selection, the number of joint compound coats, and finishing levels. Additionally, standards consider wall location, lighting, and intended wall covering to achieve optimal results.
Why Contractors Follow Finishing Standards
Contractors adhere to drywall finishing standards to ensure consistent, professional results and maintain customer satisfaction. Following these standards reduces errors and prevents costly rework caused by uneven surfaces, cracking, or paint failures.
Standards also ensure compliance with building codes, especially in commercial settings where inspections verify quality and safety. By implementing recognized guidelines, contractors provide walls that meet both functional requirements and client expectations.
Consistency Across Projects
Using standard practices ensures that walls are consistent in appearance and quality across the entire project. Clients experience uniform finishes, whether in a single room or a multi-floor commercial building. This predictability builds contractor credibility and trust with clients.
Code Compliance and Safety
Certain finishing techniques are required to meet local building codes. Compliance ensures structural safety and reduces liability risks. It also ensures that walls pass inspections, particularly in commercial and multi-family projects.
How Are Drywall Finishing Levels Defined?
Drywall finishing is classified into six standard levels, from Level 0 to Level 5, each indicating the extent of surface preparation and finishing required. These levels allow contractors to match the finish to the purpose of the room and the type of paint or wall covering applied.
Level 0 represents a bare installation, while Level 5 is a flawless finish suitable for high-gloss paint or areas with critical lighting. Knowing these levels ensures contractors apply the appropriate techniques for durability, appearance, and lighting conditions.
Level 0 and Level 1
Level 0 indicates no finishing has been done, used only in hidden or temporary areas. Level 1 includes tape over joints but no finishing compound, suitable for attics or concealed spaces. These levels are not meant for painted or visible walls.
Level 2 and Level 3
Level 2 applies one coat of compound over taped joints, ideal for garages or utility rooms. Level 3 involves two coats of compound with sanding, appropriate for walls that will receive light textures or coverings. Both levels offer moderate protection but may still show imperfections under direct light.
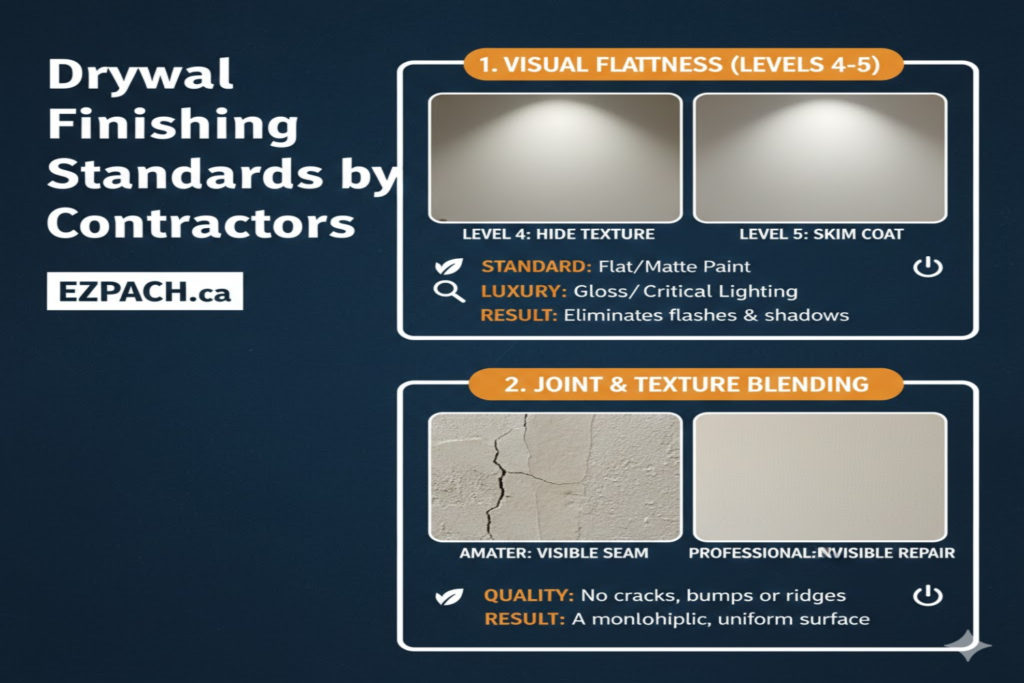
Level 4 and Level 5
Level 4 uses three coats of joint compound with sanding between layers, suitable for flat paints and smooth textures. Level 5 includes a thin skim coat over the entire surface, producing the highest quality finish for critical lighting or high-end interiors. Level 5 ensures minimal visibility of seams and defects.
What Materials Are Used in Professional Drywall Finishing?
High-quality materials are essential for achieving durable and visually appealing drywall finishes. Contractors rely on joint compounds, tapes, primers, sanders, and finishing tools to create professional results. Using the right products ensures adhesion, longevity, and smoothness.
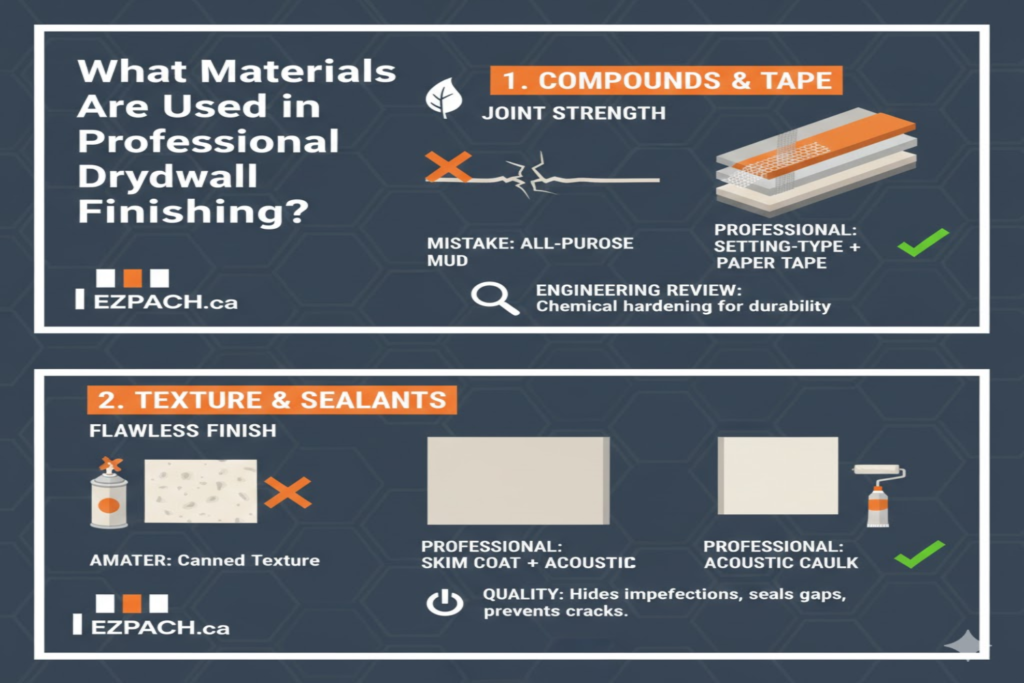
Joint Compounds
Joint compounds, either ready-mixed or powder form, fill seams, cracks, and screw holes. Lightweight compounds allow for easier sanding, while setting compounds provide faster drying and added strength. Choosing the right compound depends on wall type, damage, and finish level.
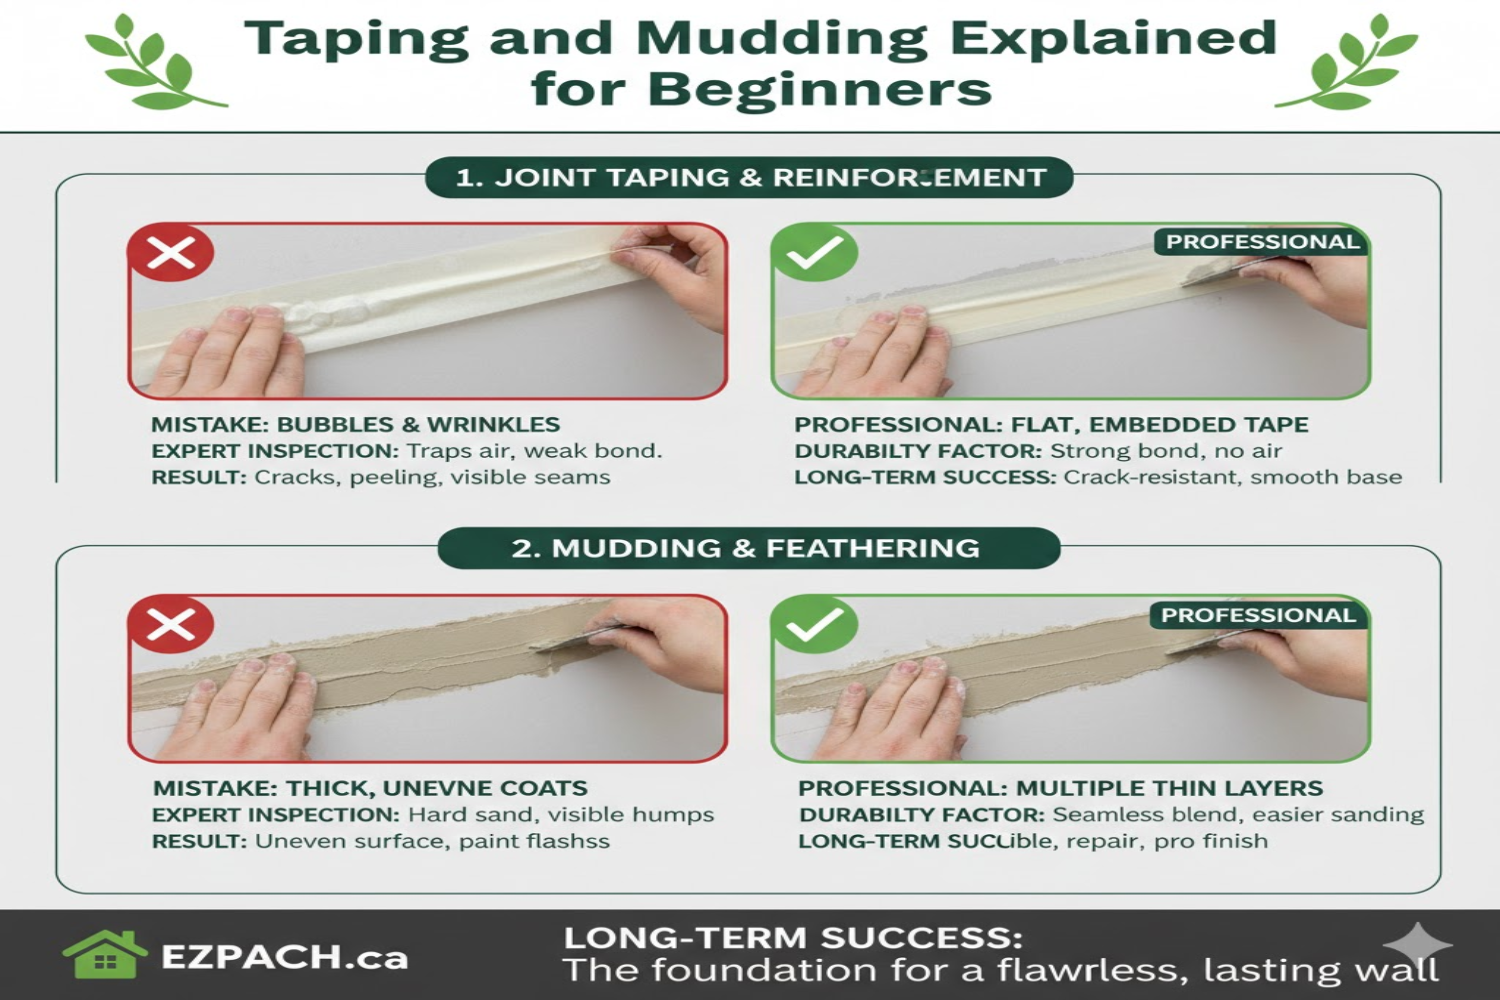
Tape and Reinforcement
Paper or fiberglass mesh tape strengthens joints and prevents cracking. Paper tape is often preferred for smooth walls, while mesh tape is used for repairs or textured surfaces. Proper application of tape ensures the repaired wall maintains structural integrity.
Primers and Sealers
Primers create a uniform surface for painting and enhance adhesion. Sealers protect walls from moisture, staining, and uneven paint absorption. Professional contractors always prime repaired or new drywall to achieve consistent finishes.
Sanding and Finishing Tools
Tools such as trowels, knives, sanding poles, corner trowels, and spray texture equipment allow for precise and efficient work. Sanding removes excess compound and feathered edges, ensuring smooth transitions. Spray equipment is often used for large areas to replicate textures quickly.
How Do Contractors Ensure Seamless Finishes?
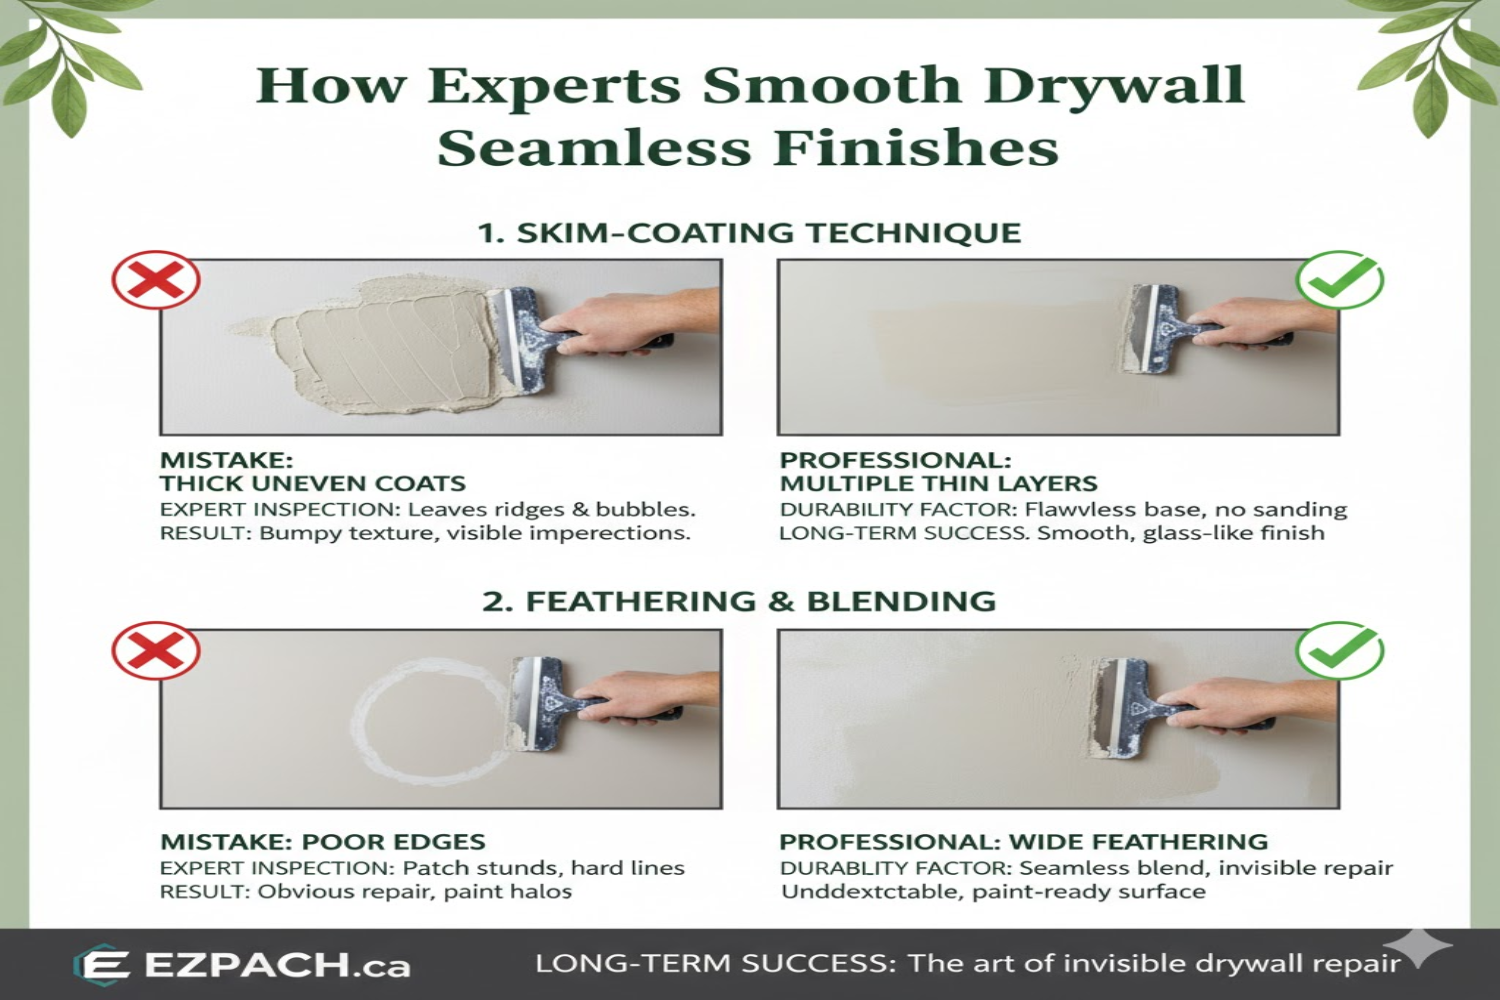
Achieving seamless drywall finishes requires careful layering, sanding, and texture matching. Contractors apply multiple coats of joint compound, sanding each layer, and finishing with precise techniques to blend the repair with the existing wall.
Attention to detail prevents visible seams, air bubbles, or surface inconsistencies. Proper lighting assessment is also essential, as flaws are often more noticeable under direct or harsh lighting conditions.
Layering and Sanding Techniques
Applying multiple thin layers prevents cracks and unevenness. Sanding between layers removes ridges and feathered edges, ensuring uniformity. The final skim coat guarantees a smooth, seamless finish ready for paint.
Texture Matching
Walls with existing textures require careful replication to maintain consistency. Contractors use spray, knockdown, or hand trowel techniques depending on the pattern. Texture matching is especially critical in repairs or renovations to avoid visible discrepancies.
Inspection and Touch-Ups
After sanding and texturing, walls are inspected for flaws. Minor imperfections are corrected before priming or painting. This ensures the finished wall meets professional standards and client expectations.
How Do Contractors Handle Repairs on Existing Walls?
Repairing existing drywall requires assessing the damage, preparing the area, and applying proper patching techniques. Contractors consider the level of finish required and select materials accordingly.
Repairs must blend with the surrounding wall, both in texture and finish. Professionals ensure repairs are invisible, durable, and ready for painting or wall coverings.
Small Holes and Cracks
Small holes are patched with spackle or lightweight compound, sanded smooth, and painted. Cracks are reinforced with tape and joint compound to prevent recurrence. Proper preparation ensures a durable and seamless repair.
Medium to Large Holes
Large holes may require cutting out the damaged section and installing new drywall panels. Joint compound is applied over taped seams in multiple layers. Sanding, feathering, and texture matching ensure the repair is indistinguishable from the existing wall.
What Are Common Mistakes in Drywall Finishing?
- Applying joint compound too thickly can cause cracks or sagging.
- Skipping sanding leads to uneven surfaces.
- Ignoring texture matching, making repairs noticeable.
- Using low-quality materials reduces durability.
- Failing to prime before painting leads to poor adhesion and color inconsistency.
Quick Comparison Table: Drywall Finish Levels
| Level | Description | Usage | Surface Quality |
| 0 | No finishing | Concealed areas | Minimal |
| 1 | Tape only | Attics, hidden spaces | Slight improvement |
| 2 | One coat over joints | Garages, utility rooms | Moderate |
| 3 | Two coats with sanding | Light texture or coverings | Good |
| 4 | Three coats, sanded | Flat paint | Very good |
| 5 | Skim coat over the entire surface | Critical lighting, high-end | Excellent, seamless |
Conclusion
Drywall finishing standards used by contractors are essential for creating smooth, durable, and visually appealing walls. Following these standards ensures consistent quality, compliance with building codes, and long-lasting performance.
By understanding finishing levels, proper materials, and professional techniques, homeowners and contractors can prevent common issues such as cracking, visible seams, or uneven paint coverage. Proper drywall finishing not only enhances property value but also ensures long-term satisfaction and safety.
FAQs
1. What are the main drywall finish levels?
They range from Level 0 (no finish) to Level 5 (perfect, seamless finish suitable for critical lighting).
2. Why is sanding necessary in finishing?
Sanding smooths the surface, removes ridges, and ensures a seamless appearance.
3. Can mesh tape be used for all repairs?
Mesh tape is ideal for repairs and textured walls; paper tape works best for smooth surfaces.
4. What tools do contractors use for finishing?
Trowels, knives, sanding poles, corner trowels, and spray texture equipment.
5. How is wall texture matched?
Contractors replicate patterns using spray, knockdown, or hand trowel techniques.
6. Is priming required after finishing?
Yes, primer ensures paint adhesion, color uniformity, and surface protection.
7. Can finishing standards prevent cracks?
Proper taping, layering, and sanding minimize cracking and increase wall durability.
8. Are commercial and residential standards different?
Yes, commercial projects often require stricter standards due to lighting, inspection, and durability needs.
Drywall Repair Halifax
EZ Patch offers clean, professional drywall, ceiling, plaster, and water damage repair services in Halifax with minimal mess and long-lasting results.
EZ Patch – Drywall Repair Experts
Trusted drywall repair professionals serving Halifax and nearby areas.
Drywall Patch & Repair
Seamless drywall repairs for holes, cracks, dents, and damaged walls.
Ceiling Repairs
Professional ceiling repair services for stains, cracks, and water damage.
Drywall Installation
Complete drywall installation services for renovations and new builds.
Taping & Mudding
Smooth, paint-ready wall finishes by expert drywall finishers.
Plaster Repair Experts
Precision plaster repair services while maintaining original wall texture.
Water Damage Repair
Drywall and ceiling restoration for properties affected by water damage.
Texture Matching
Accurate texture blending so repaired areas match existing finishes.
Installation, Repair & Removal
End-to-end drywall installation, repair, and removal solutions.