Ceiling cracks are one of the most common issues homeowners face, yet they are often misunderstood or ignored until they worsen. While some cracks are purely cosmetic, others may signal structural movement, moisture problems, or poor workmanship. Understanding ceiling crack repair steps explained clearly can help homeowners decide when a simple fix is enough and when professional help is necessary.
Ignoring ceiling cracks can lead to larger repairs, safety concerns, and higher costs over time. Small hairline cracks can expand, allow moisture penetration, and even cause plaster or drywall to fall. By learning proper ceiling crack repair steps explained in detail, homeowners can protect their ceilings, maintain property value, and ensure long-lasting results.
Understanding Ceiling Cracks and Why They Occur
Ceiling cracks develop for many reasons, ranging from natural house settling to serious structural problems. Over time, buildings expand and contract due to temperature changes, causing stress on ceiling materials. This stress often appears as cracks along joints, corners, or flat surfaces.
In some cases, ceiling cracks form due to improper installation or low-quality materials. Drywall seams that were not taped or finished correctly are especially prone to cracking. Understanding the root cause is the first and most important step before beginning any ceiling crack repair process.
Types of Ceiling Cracks You Should Know
Not all ceiling cracks are the same, and each type requires a different repair approach. Identifying the crack type ensures the repair is effective and long-lasting. Some cracks are harmless, while others may indicate deeper structural concerns.
Different crack patterns, widths, and locations provide clues about their cause. Knowing these distinctions helps homeowners choose the right tools, materials, and repair techniques.
Hairline Ceiling Cracks
Hairline cracks are thin, shallow, and usually cosmetic. They commonly appear due to normal house settling or minor temperature changes. These cracks are easy to repair and rarely indicate serious issues.
Straight Ceiling Cracks
Straight cracks often run along drywall seams. They typically result from poor taping or joint compound shrinkage. Repairing them properly requires reinforcing the seam.
Spiderweb or Pattern Cracks
Spiderweb cracks form irregular patterns across the ceiling. They are often caused by aging plaster or poor-quality paint. These cracks usually require surface repairs rather than structural fixes.
Wide or Sagging Cracks
Wide cracks or cracks accompanied by sagging can indicate moisture damage or structural movement. These require immediate attention and may need professional evaluation.
Signs That a Ceiling Crack Needs Immediate Repair
Some ceiling cracks can wait, but others demand urgent action. Delaying repairs in serious cases can lead to ceiling collapse or mold growth. Homeowners should know the warning signs that indicate a problem beyond surface damage.
Cracks that grow rapidly or change shape are particularly concerning. Stains, moisture, or crumbling material around cracks also suggest underlying issues that must be addressed before repair.
Growing Crack Length
If a crack continues to lengthen over time, it may signal ongoing movement. This suggests the cause has not stabilized. Repairs should be postponed until the movement is resolved.
Water Stains Near Cracks
Yellow or brown stains indicate moisture intrusion. Water damage weakens ceiling materials and can cause cracks to spread. The water source must be fixed first.
Sagging or Bulging Areas
Sagging ceilings are a serious safety concern. This often means the ceiling material is saturated or detached. Immediate professional assessment is recommended.
Tools and Materials Needed for Ceiling Crack Repair
Proper tools and materials are essential for successful ceiling crack repair. Using the wrong products can result in recurring cracks or poor finishes. Preparation ensures smoother repairs and longer-lasting results.
Basic tools are sufficient for most minor cracks. However, larger or recurring cracks may require specialized materials for reinforcement.
Essential Repair Tools
A putty knife, sanding block, and utility knife are basic tools for crack repair. These help remove loose material and apply the compound evenly. Quality tools make the repair process easier and cleaner.
Repair Materials
Joint compound, drywall tape, and primer are commonly used materials. Flexible compounds are preferred because they adapt to slight movement. Using high-quality products reduces future cracking.
Safety Equipment
Dust masks and safety glasses protect against debris. Repair work creates fine dust that can irritate eyes and lungs. Safety should always be a priority.
Ceiling Crack Repair Steps Explained: Preparation Stage
Preparation is the foundation of any successful ceiling repair. Skipping preparation often leads to cracks reappearing within months. This stage ensures proper adhesion and a smooth finish.
The ceiling surface must be clean, dry, and stable before applying any repair materials. Addressing underlying issues during preparation prevents repeat damage.
Cleaning the Crack Area
Loose paint, dust, and debris should be removed from the crack. A clean surface allows joint compound to bond properly. Vacuuming or wiping with a dry cloth is effective.
Widening the Crack Slightly
Slightly widening the crack helps compound penetrate deeper. This creates a stronger bond and reduces future cracking. A utility knife works well for this step.
Checking for Moisture
Ensure the ceiling is completely dry before repair. Moisture trapped behind the compound can cause bubbling or mold. Use fans or dehumidifiers if necessary.
Step-by-Step Ceiling Crack Repair Process
This section explains the actual repair process in detail. Following each step carefully ensures a professional-looking result. The ceiling crack repair steps explained here apply to most drywall ceilings.
Patience is key during this stage. Allowing proper drying time between steps prevents imperfections and repeated cracks.
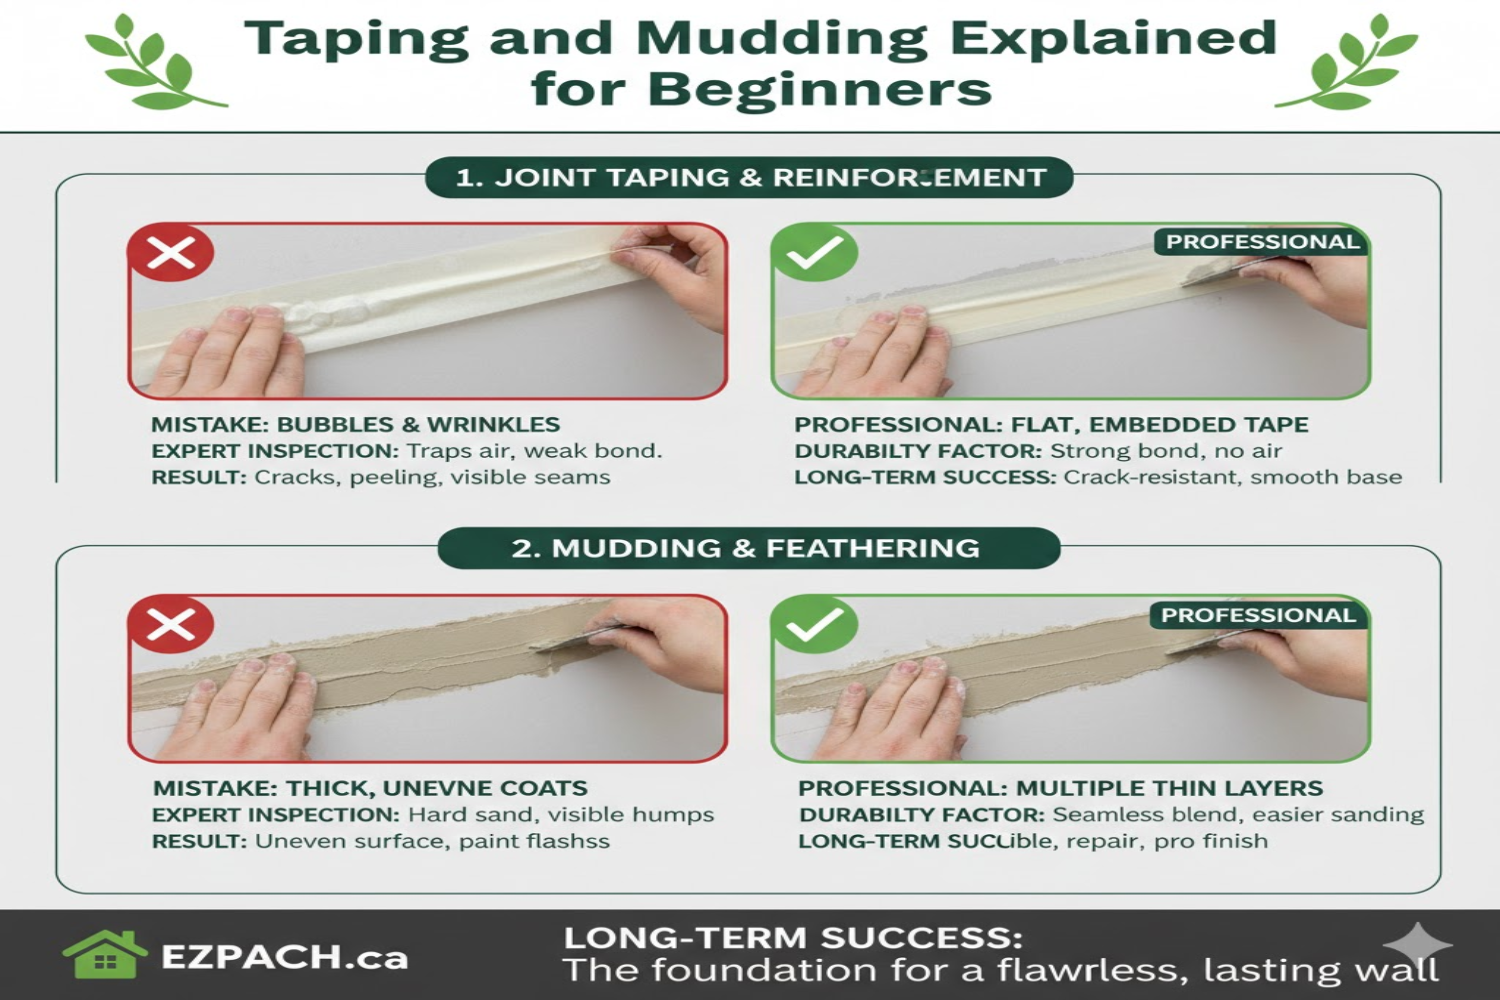
Apply Drywall Tape
Drywall tape reinforces the crack and prevents it from reopening. Press the tape firmly over the crack. Self-adhesive mesh tape is easier for beginners.
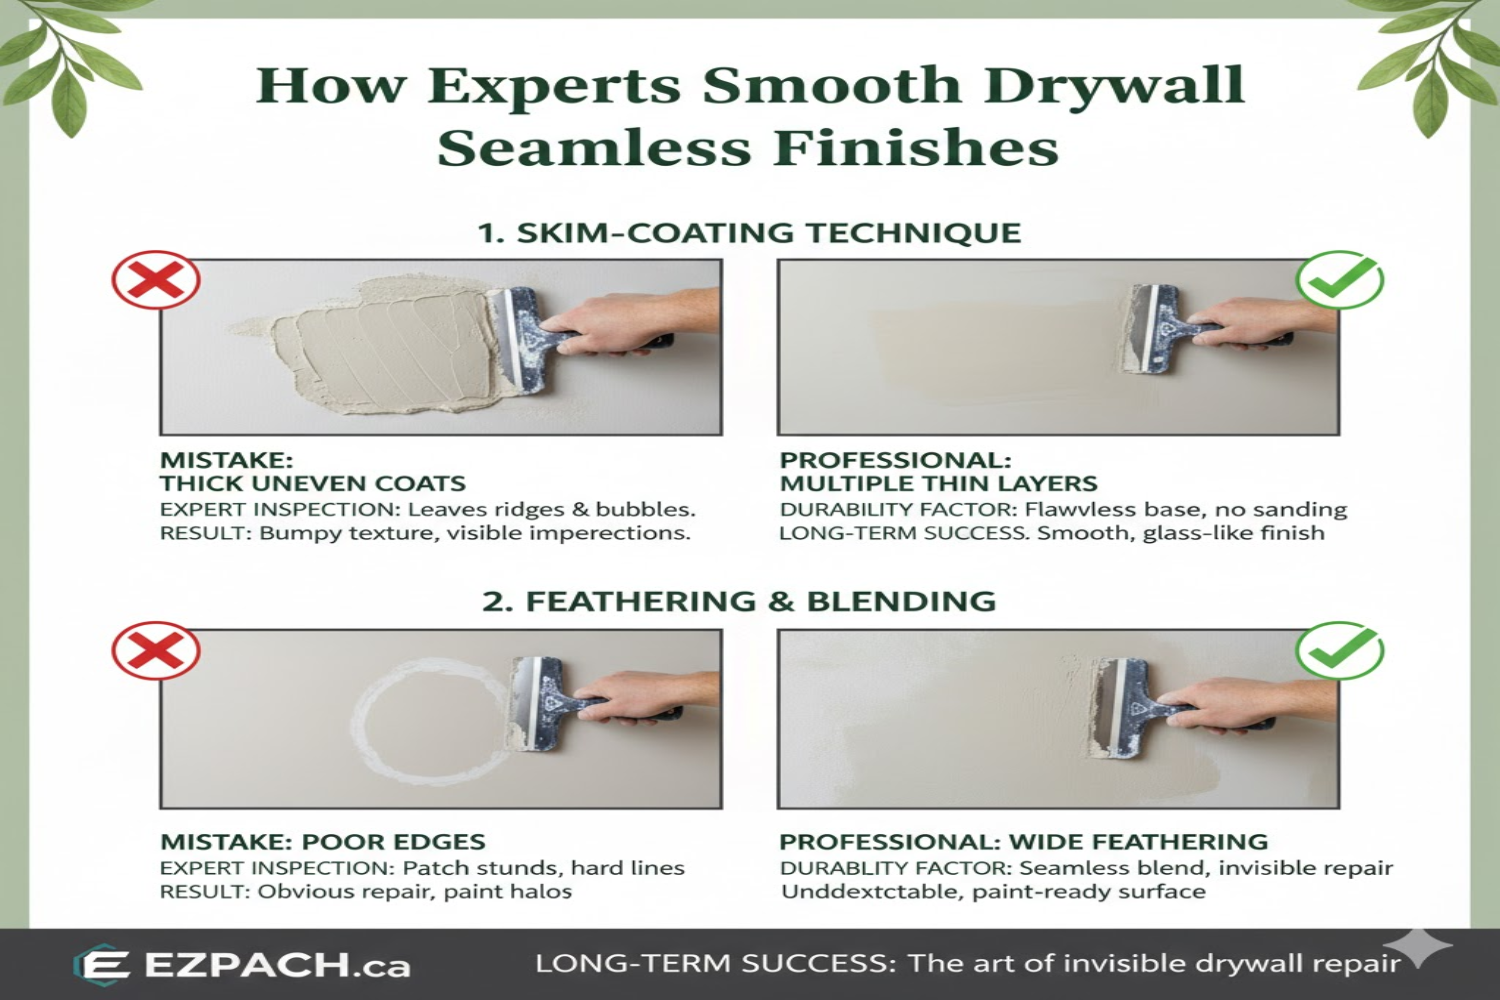
Apply First Coat of Joint Compound
Use a putty knife to spread compound over the tape. Apply thin, even layers to avoid lumps. Feather the edges for smooth blending.
Allow Drying Time
Let the compound dry completely before sanding. Rushing this step can damage the repair. Drying time varies based on humidity and compound type.
Sand the Surface
Lightly sand the dried compound until smooth. Avoid oversanding, which can expose the tape. Wipe away dust before continuing.
Apply Second and Third Coats
Additional thin coats improve strength and appearance. Each coat should be wider than the last. Allow drying and sanding between coats.
Repairing Ceiling Cracks Caused by Structural Movement
Structural movement requires a slightly different approach. Simple patching may fail if the movement continues. Flexible materials and reinforcement are essential.
In some cases, cracks may return even after repair. Understanding movement-related repairs helps manage expectations.
Using Flexible Joint Compound
Flexible compounds adapt to slight movement. They reduce the likelihood of cracks reopening. These are ideal for older homes.
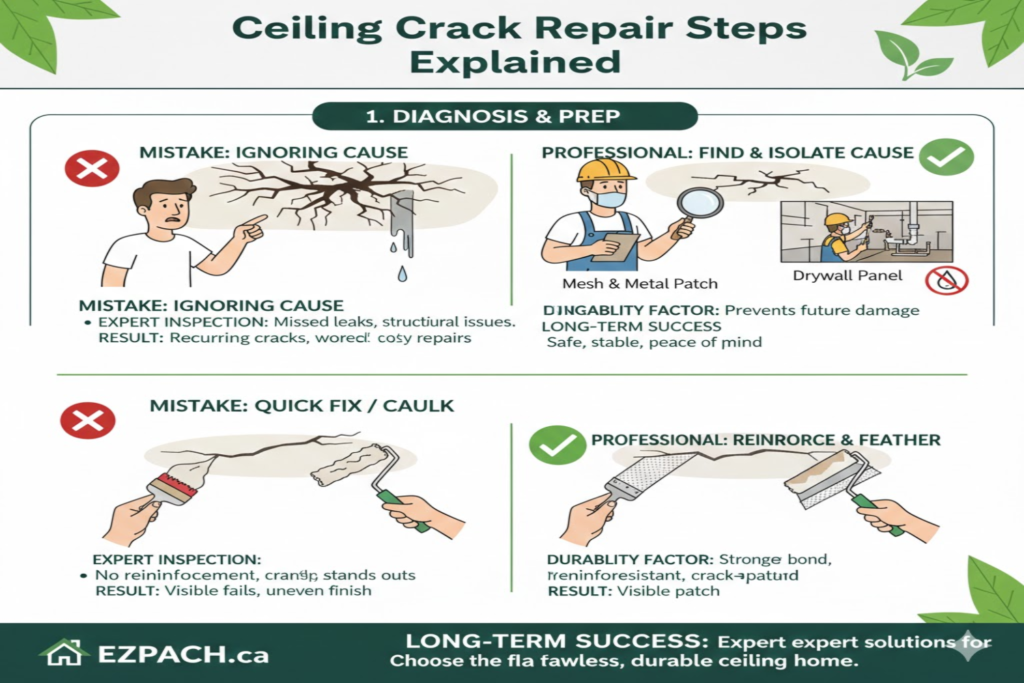
Reinforcing with Fiberglass Tape
Fiberglass tape adds strength to repaired areas. It is more durable than paper tape. This is useful for recurring cracks.
Monitoring After Repair
Watch repaired areas over time. Minor movement may continue without worsening. Major changes should be evaluated by a professional.
Repairing Ceiling Cracks Due to Water Damage
Water-damaged ceilings require special attention. Repairing cracks without fixing the water source guarantees failure. Moisture weakens ceiling materials and spreads damage.
Proper drying and inspection are critical before starting repairs. Mold prevention is also a major concern.
Identifying the Water Source
Leaks may come from roofs, pipes, or bathrooms. The source must be repaired first. Ignoring this step wastes time and money.
Removing Damaged Material
Soft or crumbling ceiling material must be removed. Repairing over-damaged material leads to sagging. Replace severely damaged sections if needed.
Mold Prevention Measures
Apply mold-resistant primer after repairs. Ensure proper ventilation in moisture-prone areas. Mold prevention protects health and ceiling longevity.
Common Mistakes to Avoid During Ceiling Crack Repair
One of the most common mistakes during ceiling crack repair is ignoring the underlying cause of the crack. Simply covering the crack without addressing issues like moisture, structural movement, or poor installation often leads to recurring damage.
- Skipping crack reinforcement: Failing to use drywall or fiberglass tape weakens the repair and increases the chance of the crack reopening.
- Applying joint compound too thickly: Thick layers shrink and crack as they dry, reducing durability and finish quality.
- Repairing over moisture: Moist surfaces prevent proper adhesion and can trap mold behind the ceiling.
- Neglecting surface preparation: Not cleaning or widening the crack slightly limits compound penetration and strength.
- Painting too soon: Painting before the compound fully dries can cause bubbling, peeling, or discoloration.
Avoiding these mistakes ensures your ceiling crack repair lasts longer and looks professional. Taking time to follow proper steps saves money, effort, and prevents repeat repairs.
When to Call a Professional for Ceiling Crack Repair
Not all ceiling cracks are suitable for DIY repair. Some situations require professional expertise. Knowing when to call for help prevents costly mistakes.
Professionals can identify hidden issues and provide long-term solutions. Structural safety should never be compromised.
Large or Spreading Cracks
Cracks wider than 1/8 inch may indicate structural problems. These should be inspected by professionals. DIY repairs may mask serious issues.
Cracks with Sagging Ceilings
Sagging ceilings pose collapse risks. Immediate professional attention is necessary. Safety should be the top priority.
Repeated Crack Failures
If cracks keep returning, the underlying cause remains unresolved. Professionals can diagnose and fix the root problem.
Preventive Measures to Avoid Ceiling Cracks
Prevention reduces the need for frequent repairs. Simple maintenance steps can significantly extend the ceiling’s lifespan. Proactive care saves money and effort.
Preventive actions also improve overall home durability.
- Maintain stable indoor humidity levels.
- Address leaks immediately
- Use quality materials during renovations.
- Ensure proper attic insulation.
- Schedule regular home inspection.
Conclusion
Ceiling cracks may seem minor, but they often reveal important information about a home’s condition. Understanding ceiling crack repair steps explained in detail empowers homeowners to act confidently and responsibly. Proper identification, preparation, and repair techniques ensure durable and visually appealing results.
By following the correct ceiling crack repair steps explained throughout this guide, homeowners can avoid recurring issues and costly repairs. Whether addressing cosmetic cracks or more serious damage, informed decisions lead to safer and more comfortable living spaces. Regular maintenance and timely repairs protect both ceilings and peace of mind.
FAQs
1. Can ceiling cracks affect home value?
Yes, visible ceiling cracks can reduce buyer confidence and perceived home value. Proper repairs help maintain a positive impression.
2. How long does ceiling crack repair usually take?
Minor repairs can be completed in a day, while larger repairs may take several days due to drying time.
3. Is repainting always necessary after ceiling crack repair?
Repainting is recommended to achieve a uniform appearance. It also helps seal and protect the repaired area.
4. Can ceiling cracks appear seasonally?
Yes, temperature and humidity changes can cause seasonal expansion and contraction, leading to temporary cracks.
5. Are plaster ceiling cracks repaired differently from drywall cracks?
Yes, plaster repairs often require specialized materials and techniques. Plaster is more rigid and prone to different crack patterns.
6. Do ceiling cracks always indicate foundation problems?
No, many cracks are cosmetic or related to settling. However, large or growing cracks should be evaluated.
7. Can ceiling cracks be repaired without sanding?
Sanding is usually necessary for a smooth finish. Skipping it often results in visible repair lines.
8. Is it safe to live in a home with ceiling cracks?
Most small cracks are safe, but sagging or widening cracks may pose risks. When in doubt, seek professional advice.
Drywall Repair Halifax
EZ Patch offers clean, professional drywall, ceiling, plaster, and water damage repair services in Halifax with minimal mess and long-lasting results.
EZ Patch – Drywall Repair Experts
Trusted drywall repair professionals serving Halifax and nearby areas.
Drywall Patch & Repair
Seamless drywall repairs for holes, cracks, dents, and damaged walls.
Ceiling Repairs
Professional ceiling repair services for stains, cracks, and water damage.
Drywall Installation
Complete drywall installation services for renovations and new builds.
Taping & Mudding
Smooth, paint-ready wall finishes by expert drywall finishers.
Plaster Repair Experts
Precision plaster repair services while maintaining original wall texture.
Water Damage Repair
Drywall and ceiling restoration for properties affected by water damage.
Texture Matching
Accurate texture blending so repaired areas match existing finishes.
Installation, Repair & Removal
End-to-end drywall installation, repair, and removal solutions.